Build an Outfit Try-On Telegram Bot with Black Forest Labs
Have you ever wanted to try on the clothes you see while online shopping, but you don't want to get off the couch? Well, now you can with VirtualFit, our Telegram bot for outfit try-ons.
We built this Telegram bot using Black Forest Labs for image generation. Send the bot a selfie and a product image or URL, and it will generate a photorealistic try-on image of you wearing the item.
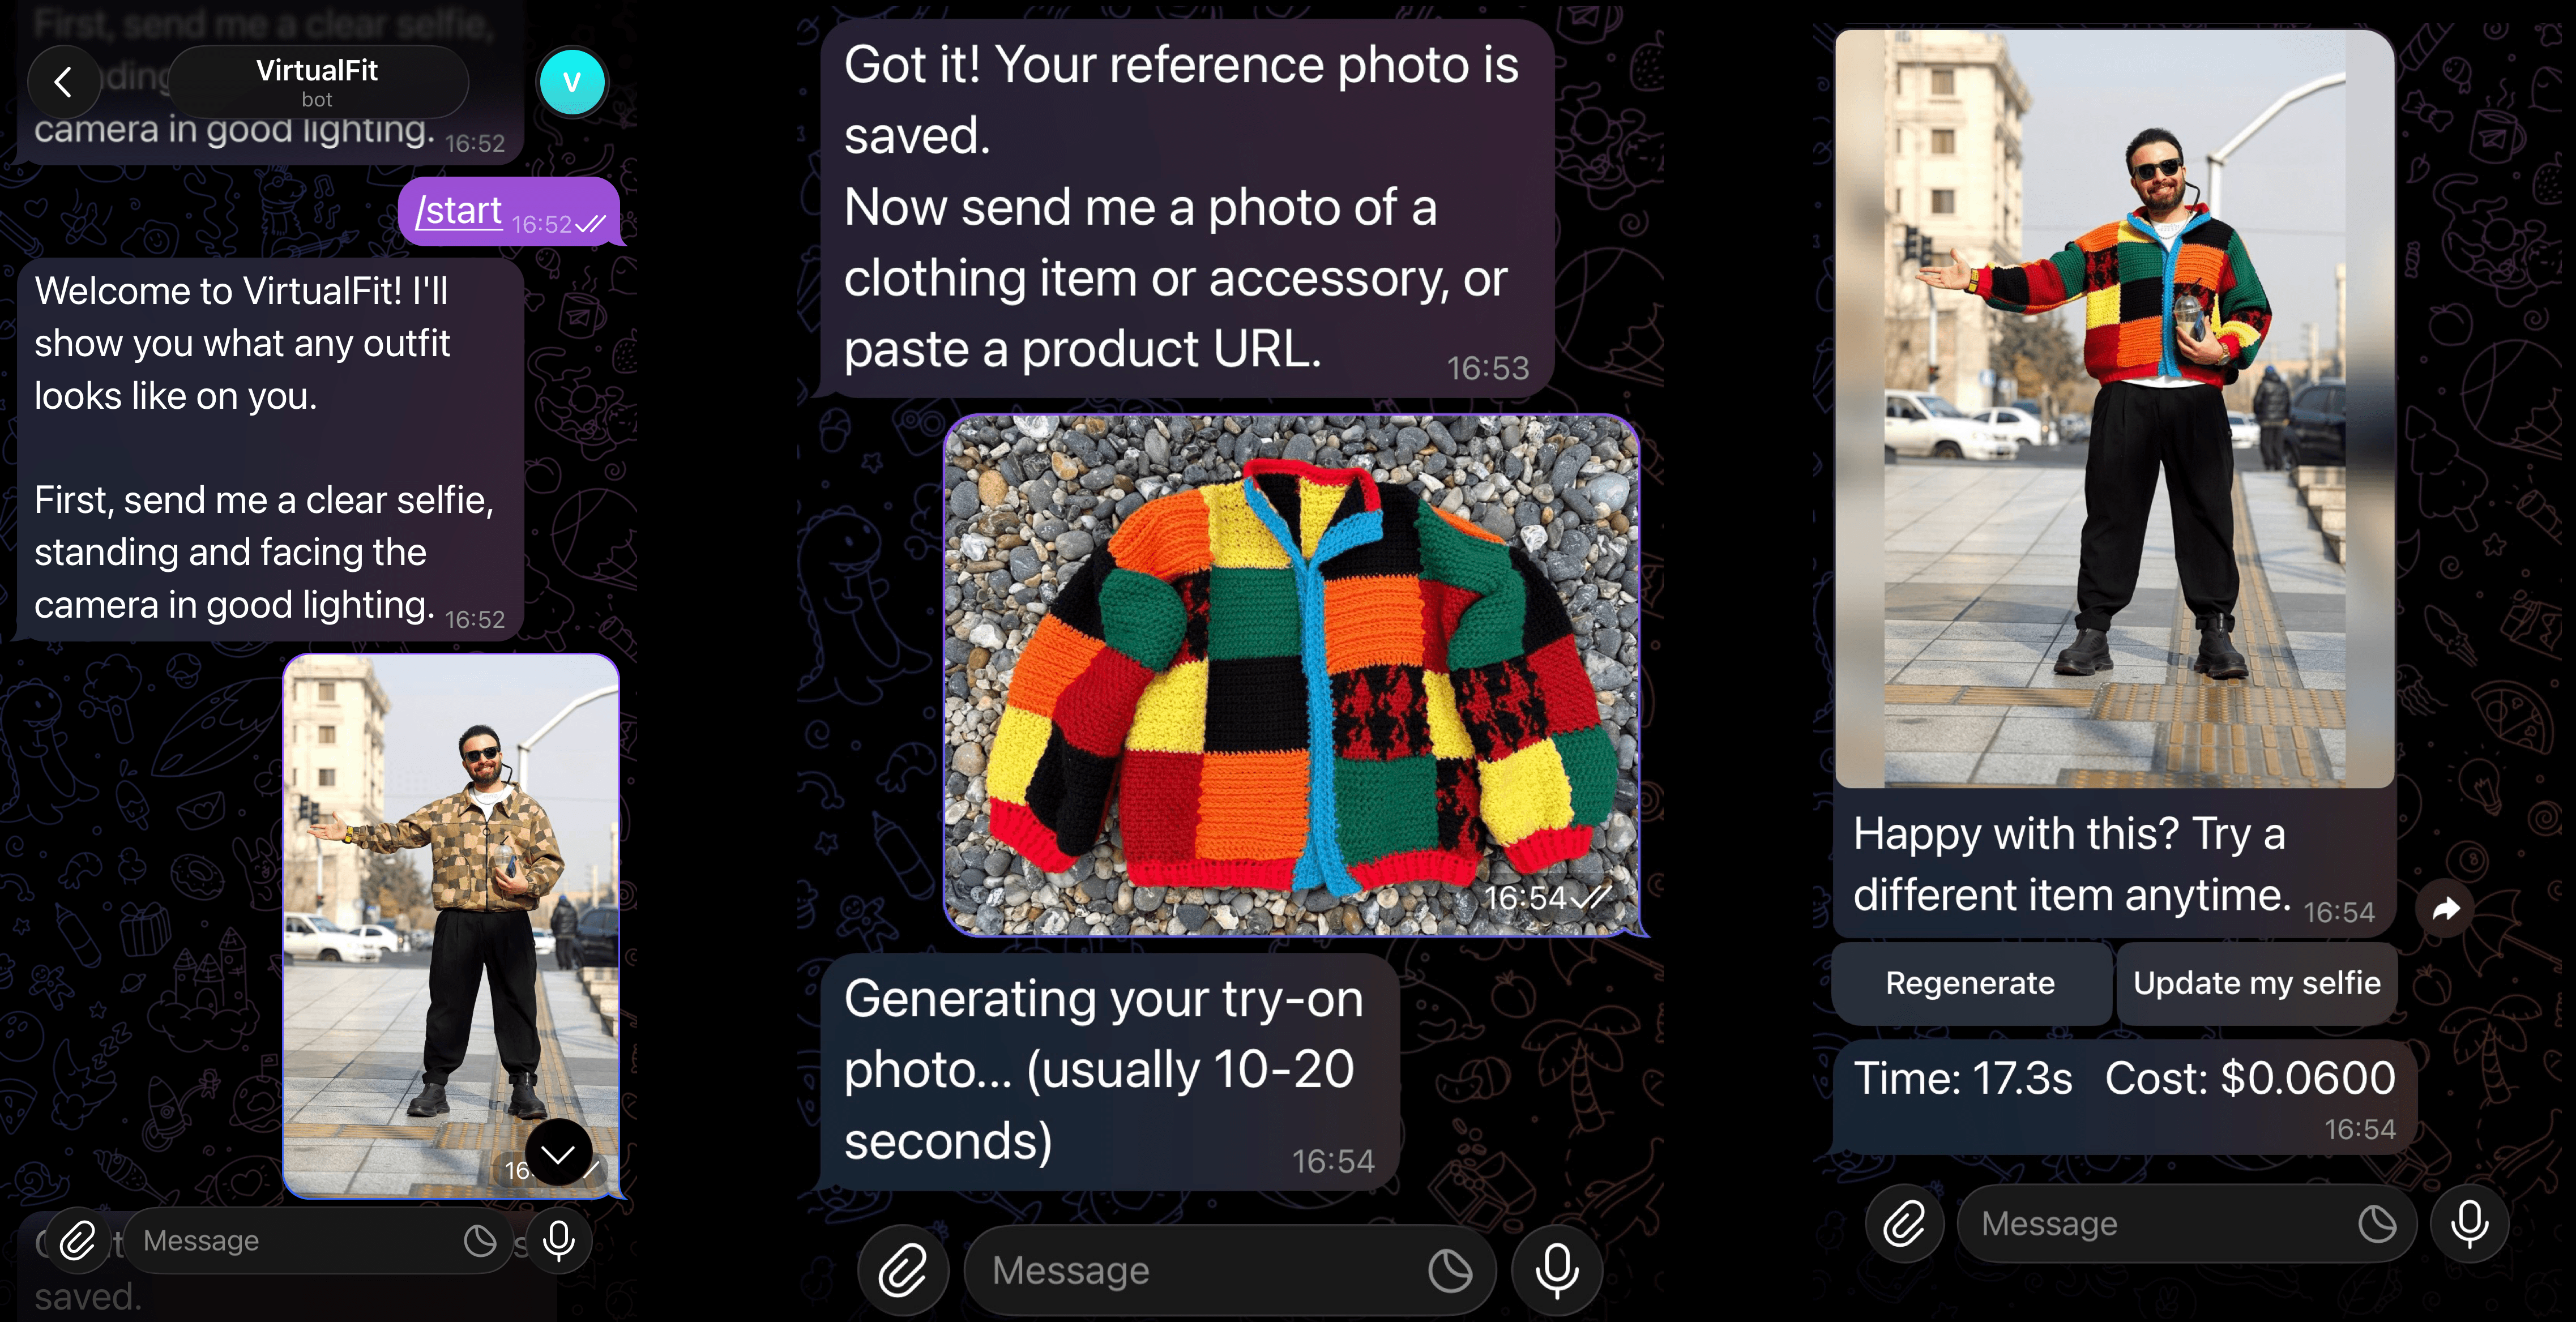
Here's what it looks like to try on an outfit.
Here is the GitHub repo if you want to jump right in.
This guide will walk you through how it works, some comparisons with Gemini 2.5 Flash (Nano Banana), and how to get it working with our GitHub repository. Or you can follow along with the tutorial to build it yourself.
How It Works
VirtualFit uses the FLUX.2 model from Black Forest Labs (referred to as BFL for the remainder of this article) to generate photorealistic try-on images.
Here's how it works:
- Start a conversation and send a selfie. The bot saves this as your reference photo.
- Send a product image or paste a product URL. The bot fetches the item and generates a try-on image of you wearing it.
- If you're not happy with the result, hit Regenerate to get a new variation.
- Update your reference photo at any time with
/updateselfie.
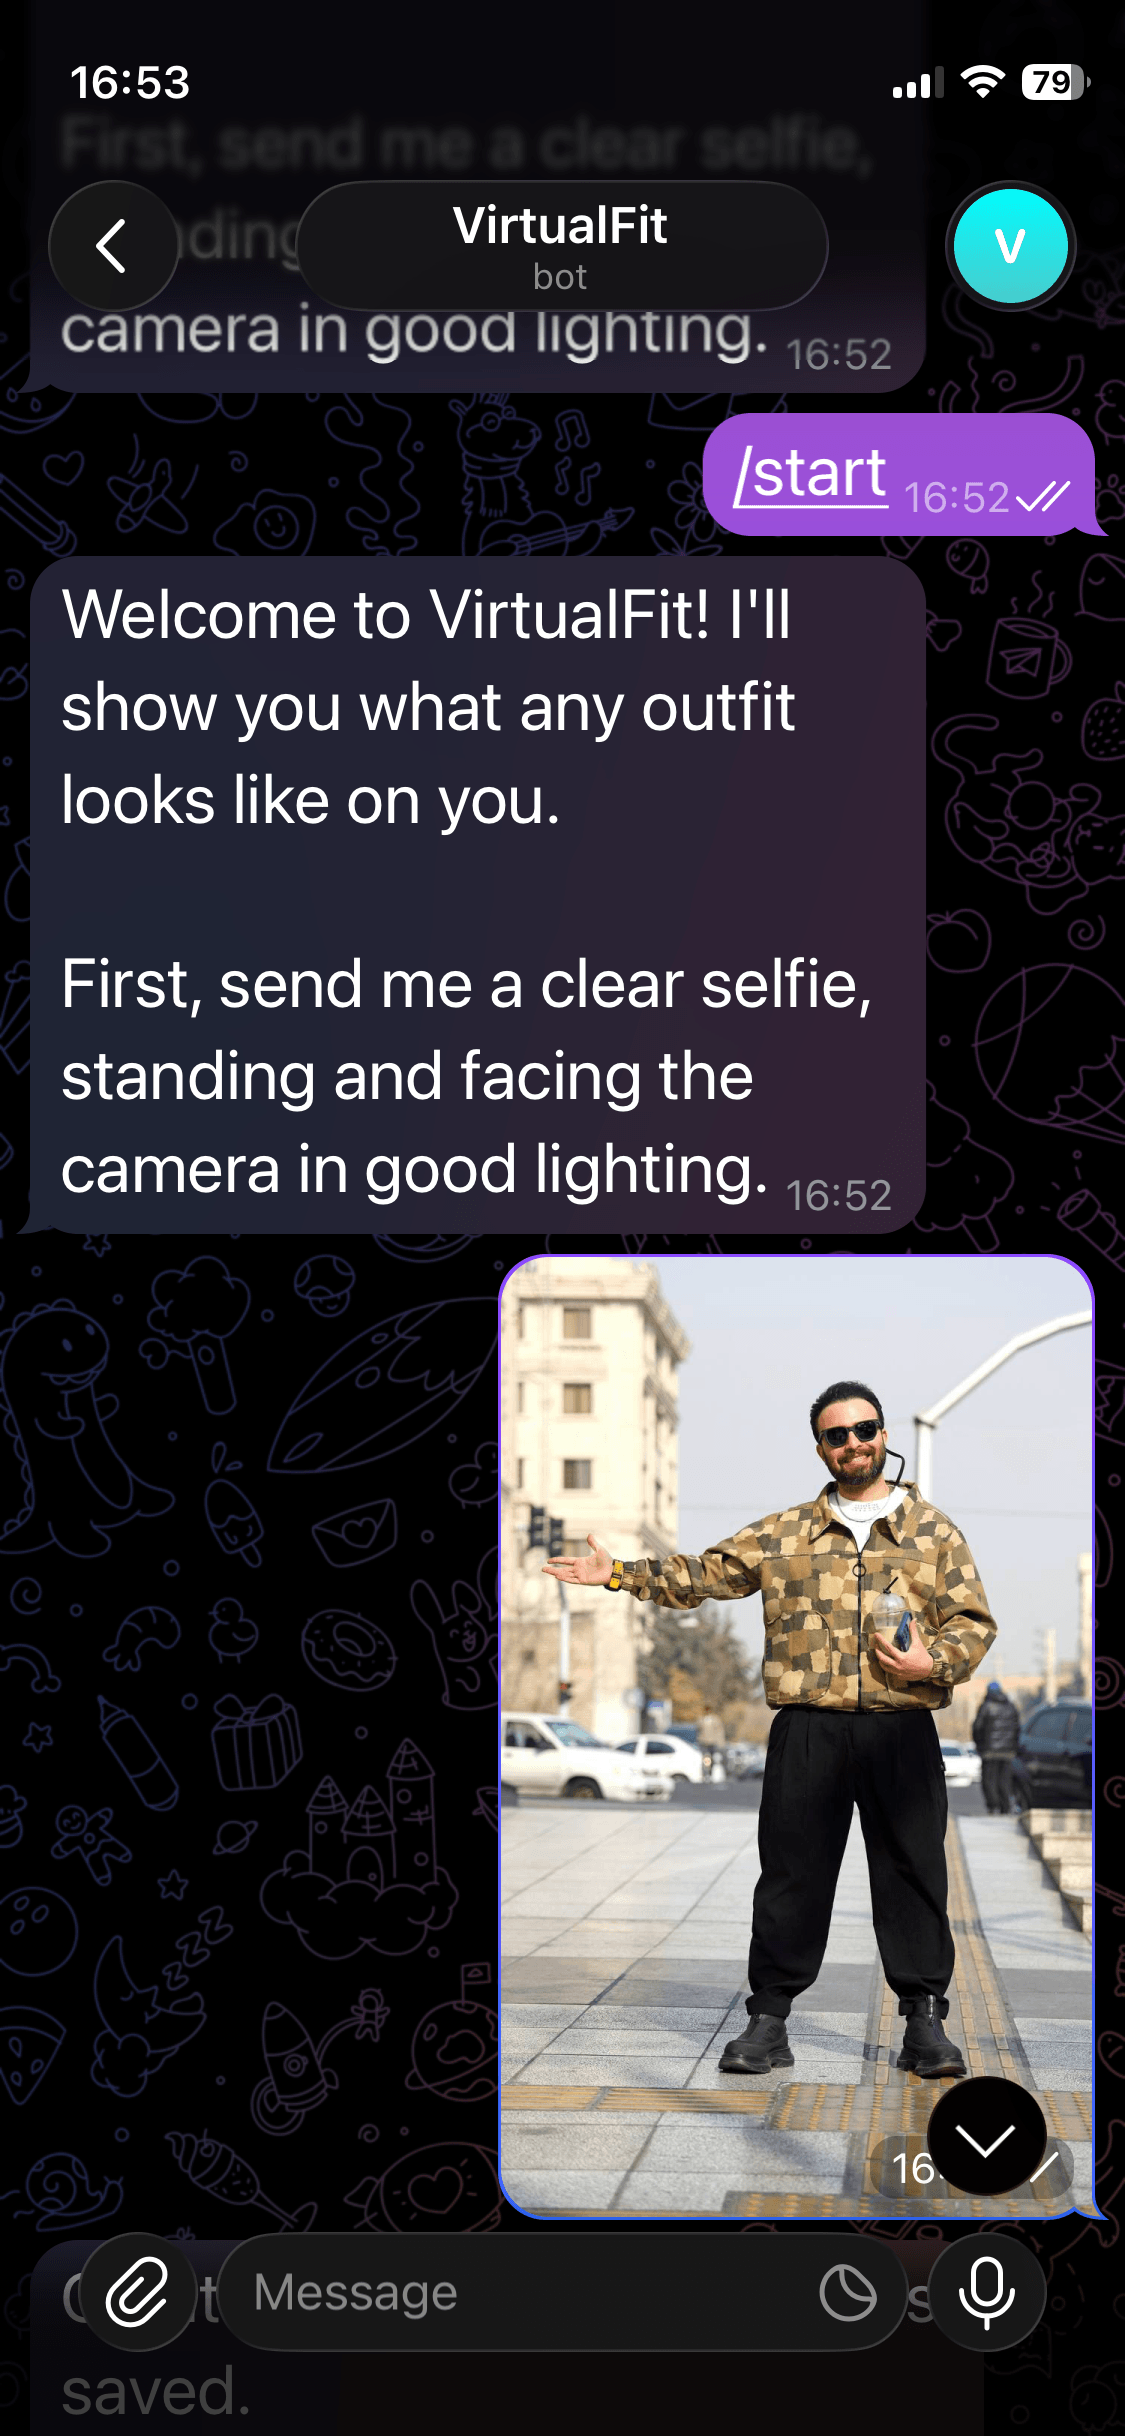
Start a Conversation
Search for your bot in Telegram and send /start to begin.
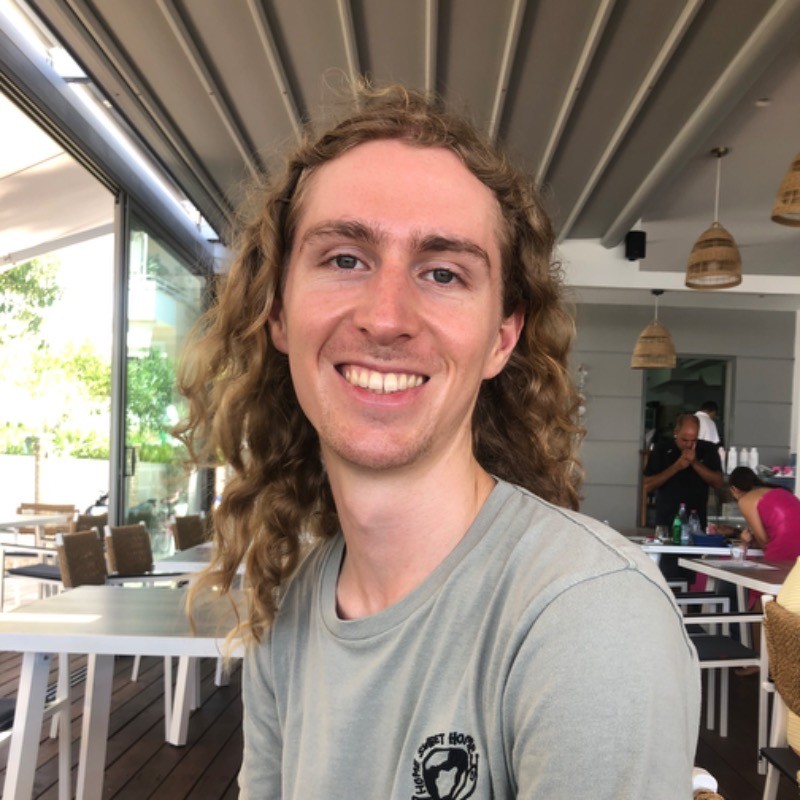
Send Your Selfie
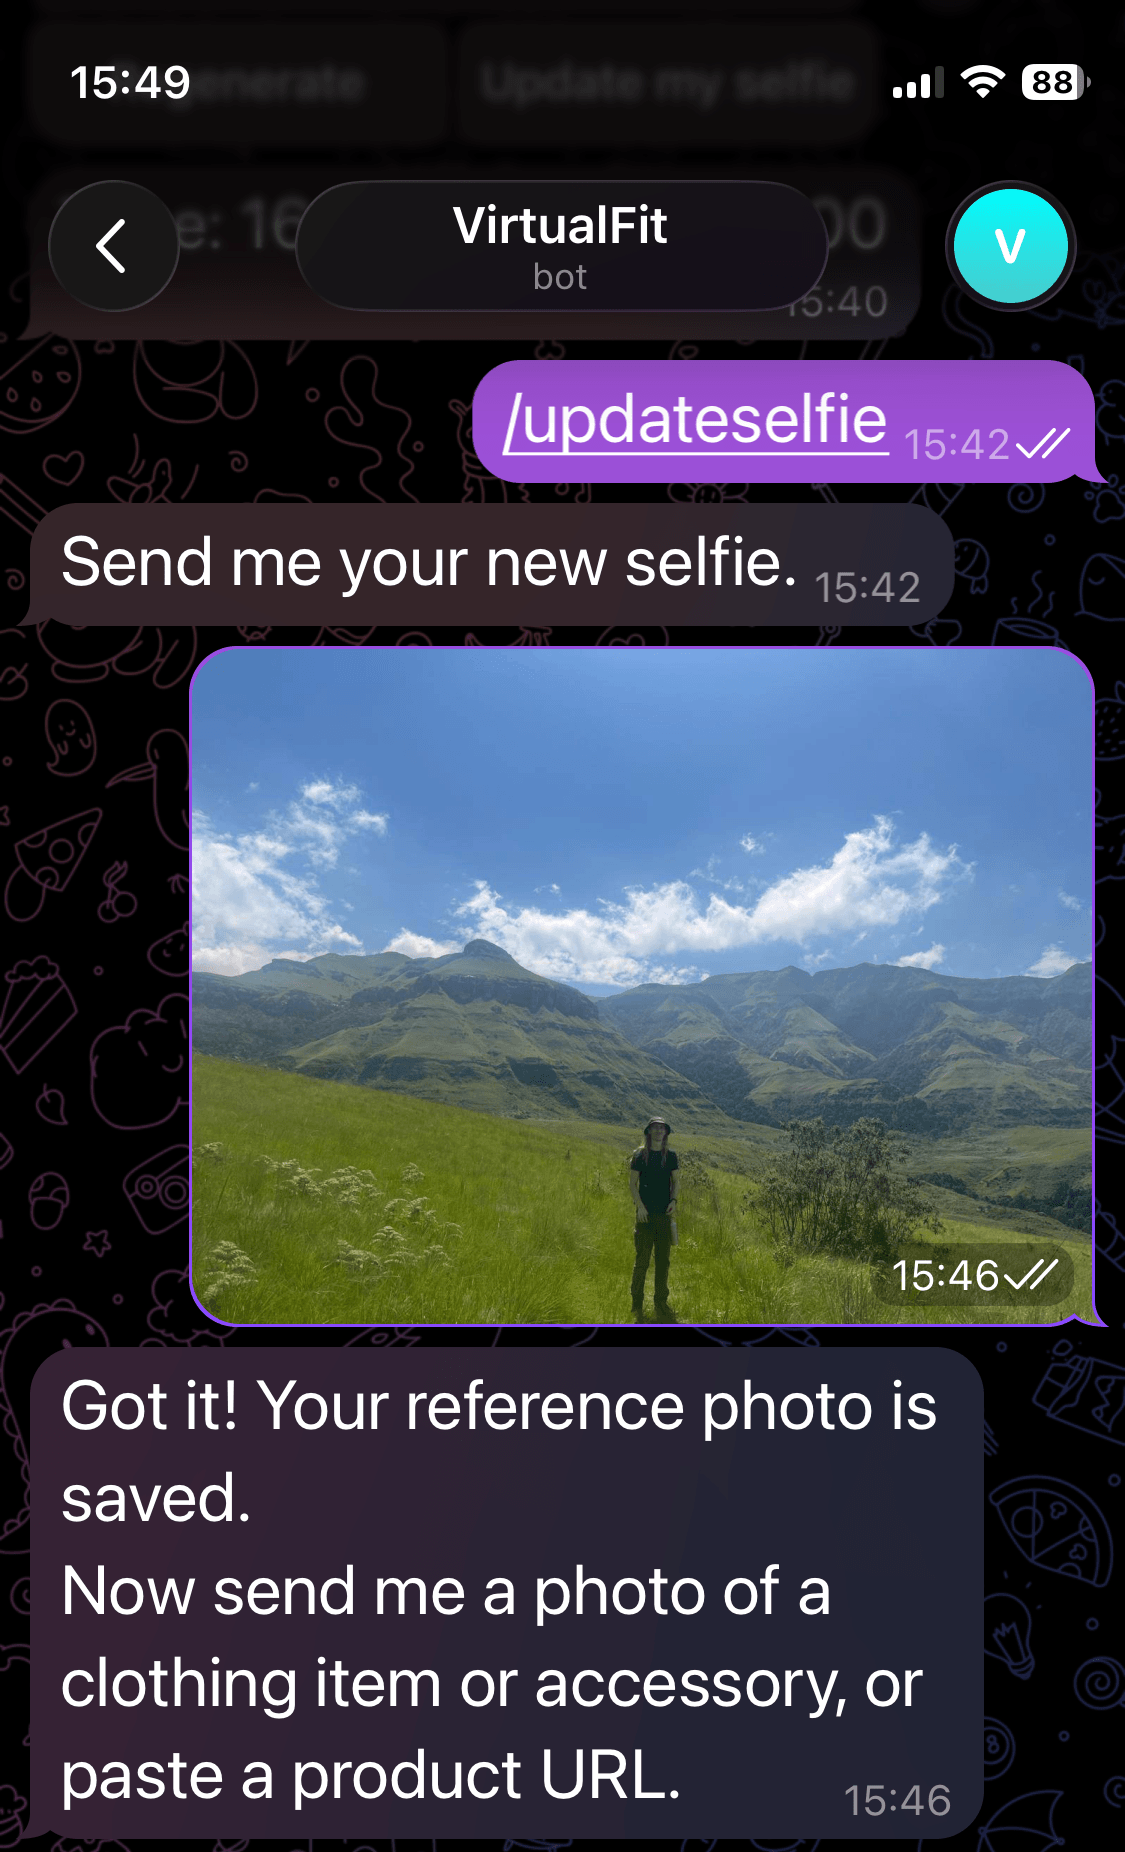
You will be prompted to upload a selfie. The bot will use this as the reference image for all outfits generated. You can change your reference image at any time with /updateselfie.
Thanks for the selfie, Babak Eshaghian on Unsplash.
Send a Product Image
Next, you will be prompted to send a photo or a link of an item of clothing you would like to try on. Try this out by sending a photo.
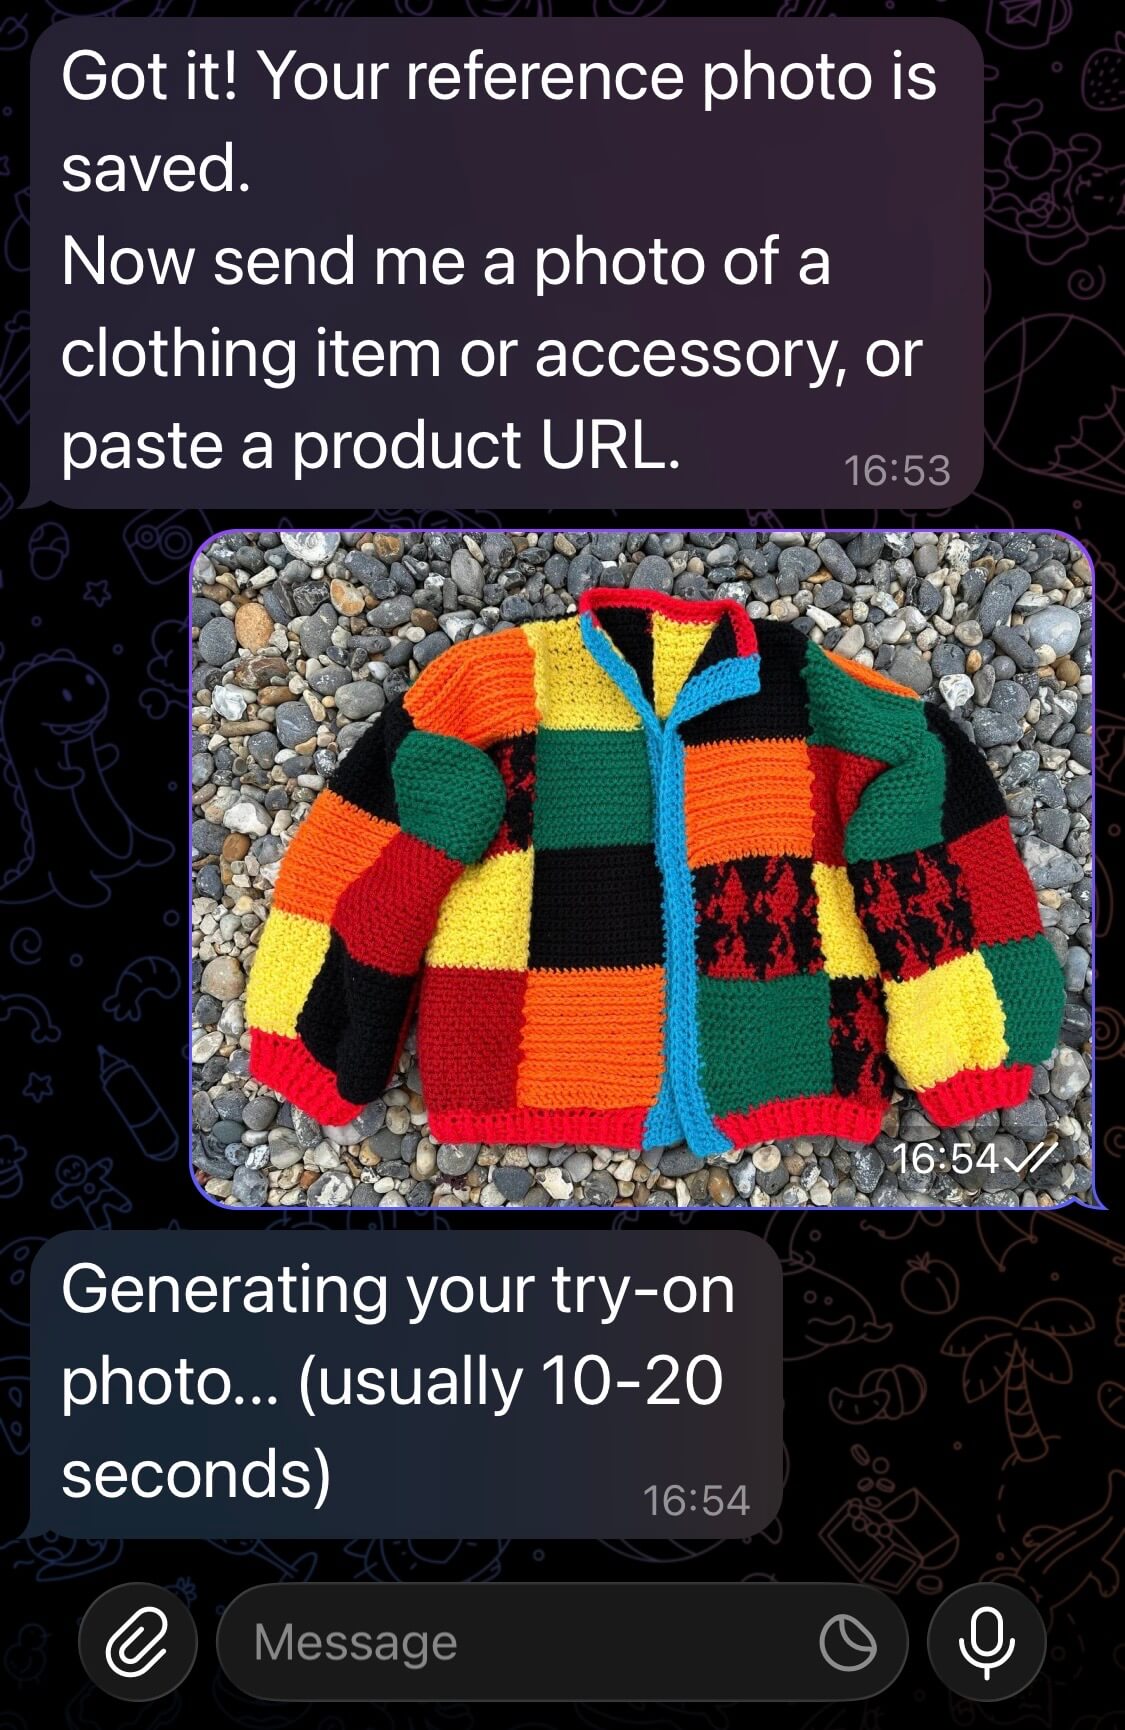
Get a Try-On Image Generated
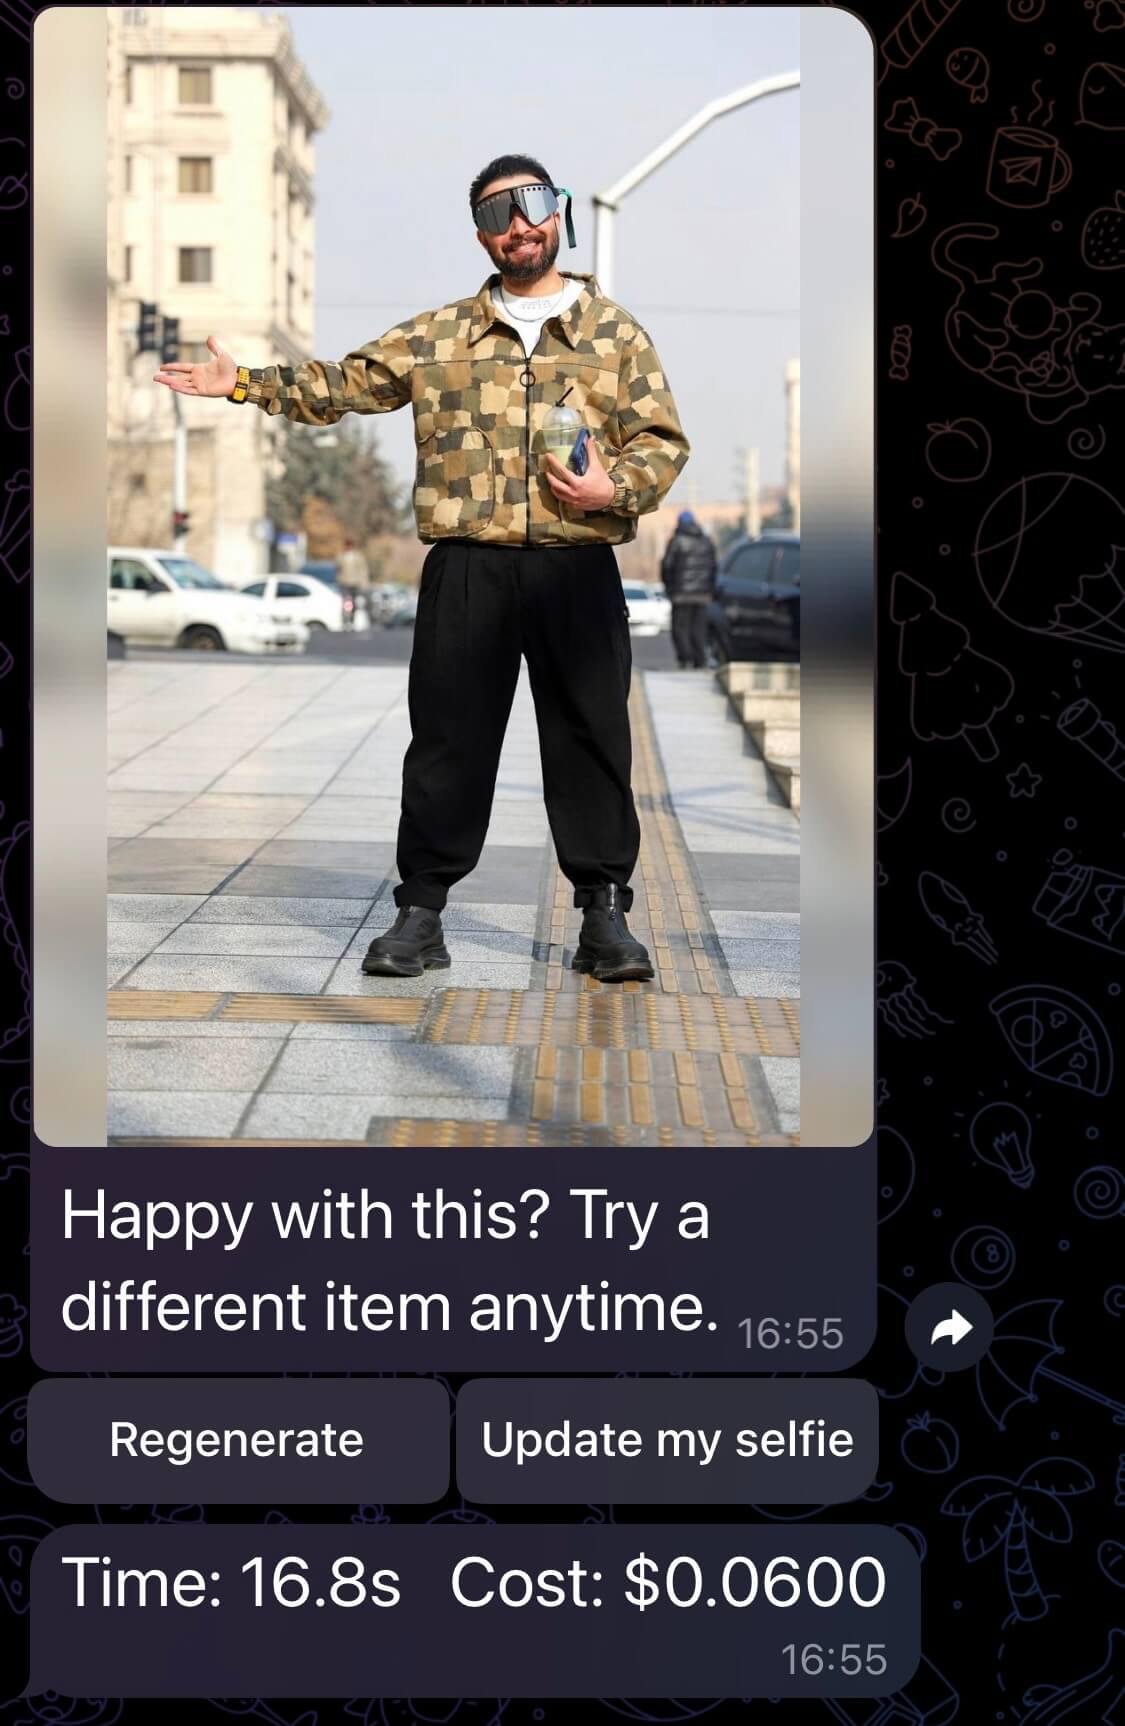
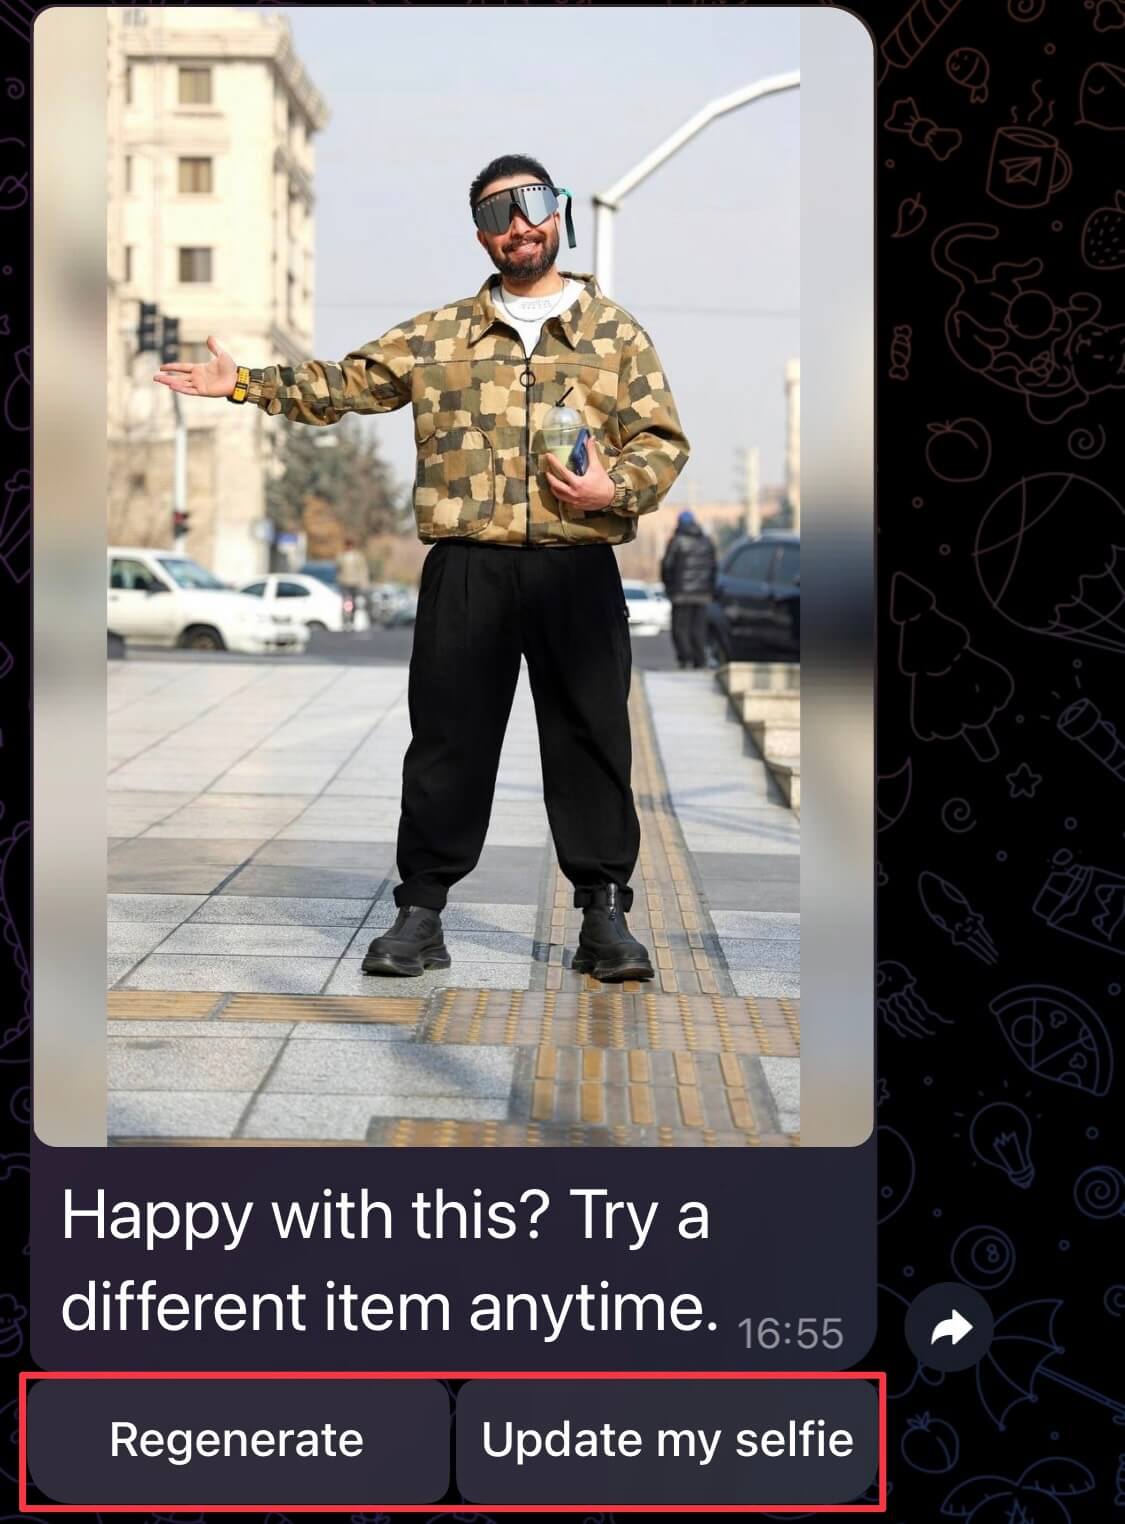
You should get your generated image within 20 seconds (based on the results of my tests).
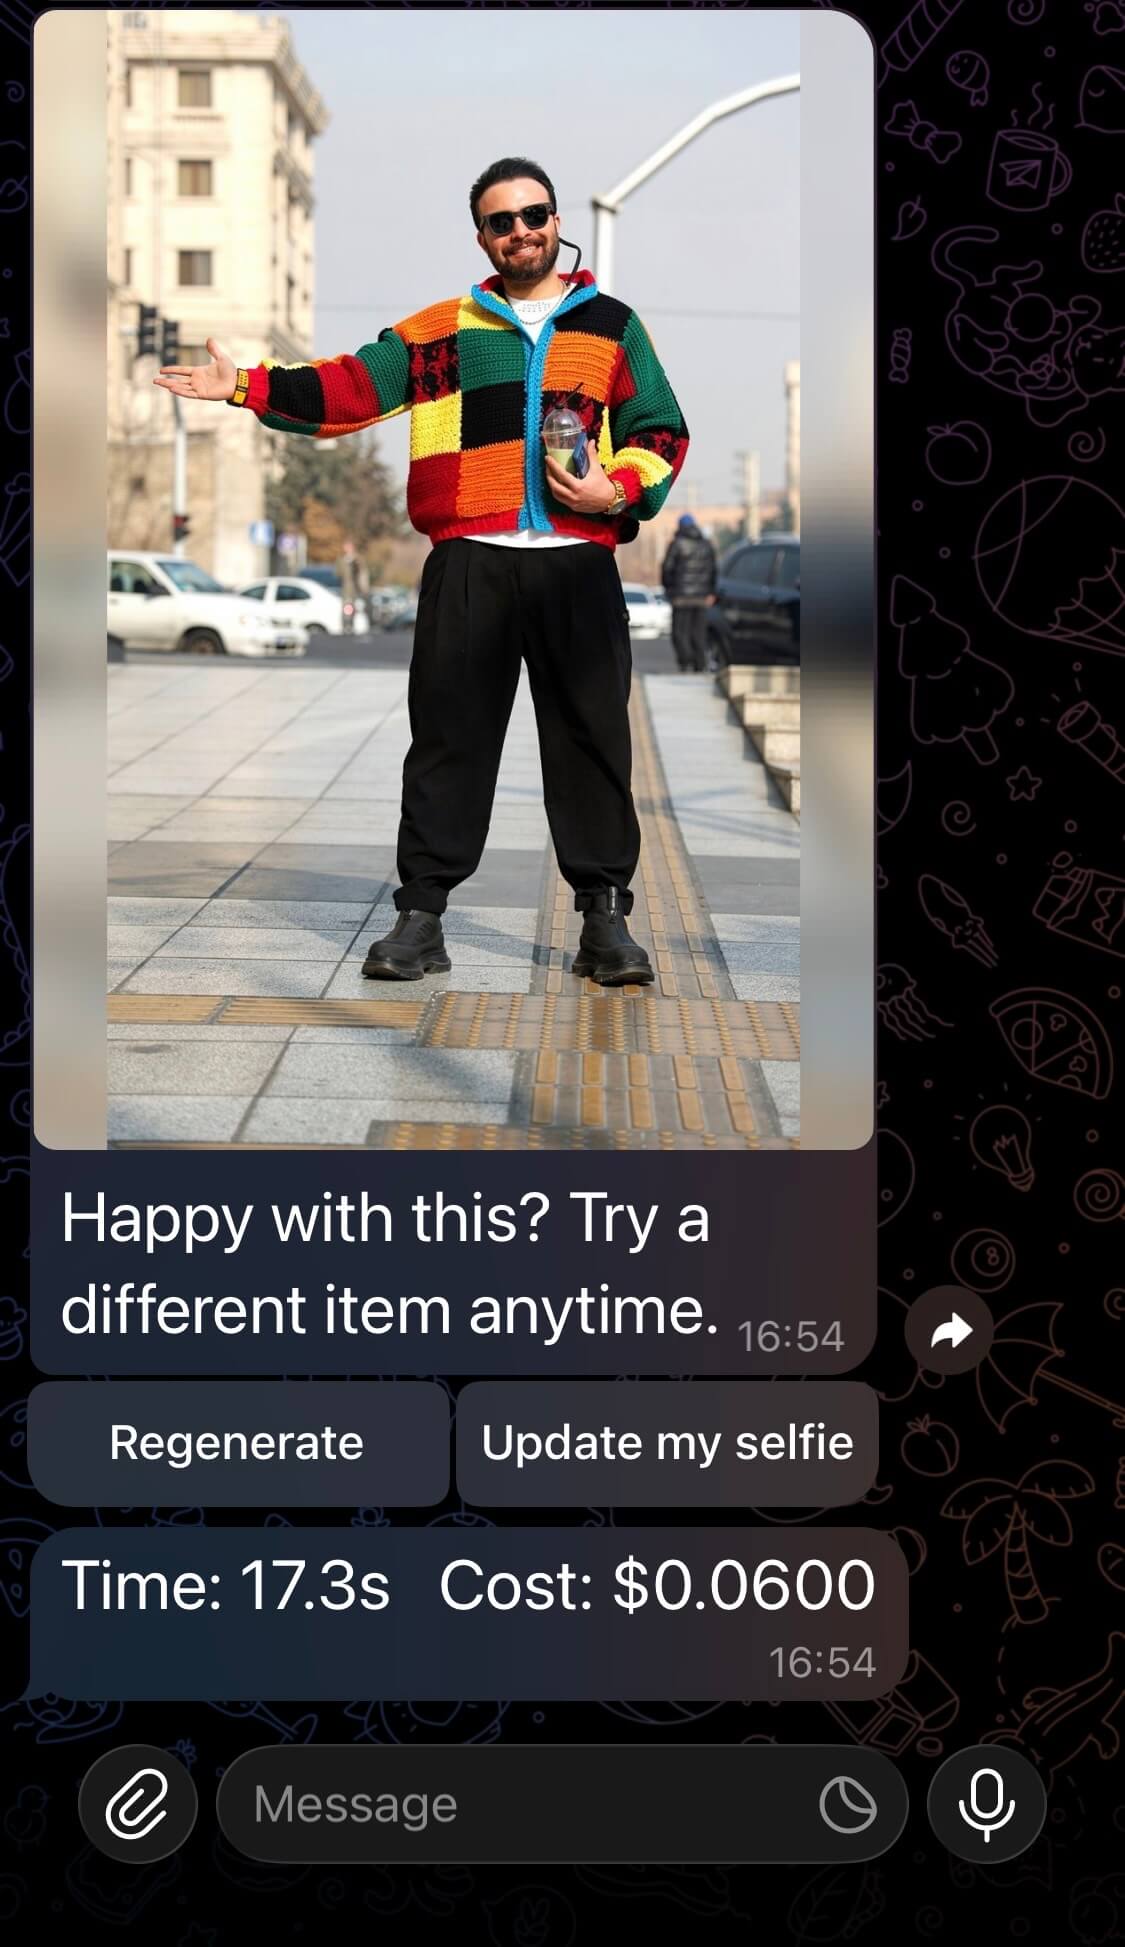
You will also get two buttons that will allow you to regenerate the image if there are any flaws, or update your selfie. As well as a breakdown of how long it took to generate the image and how much it cost.
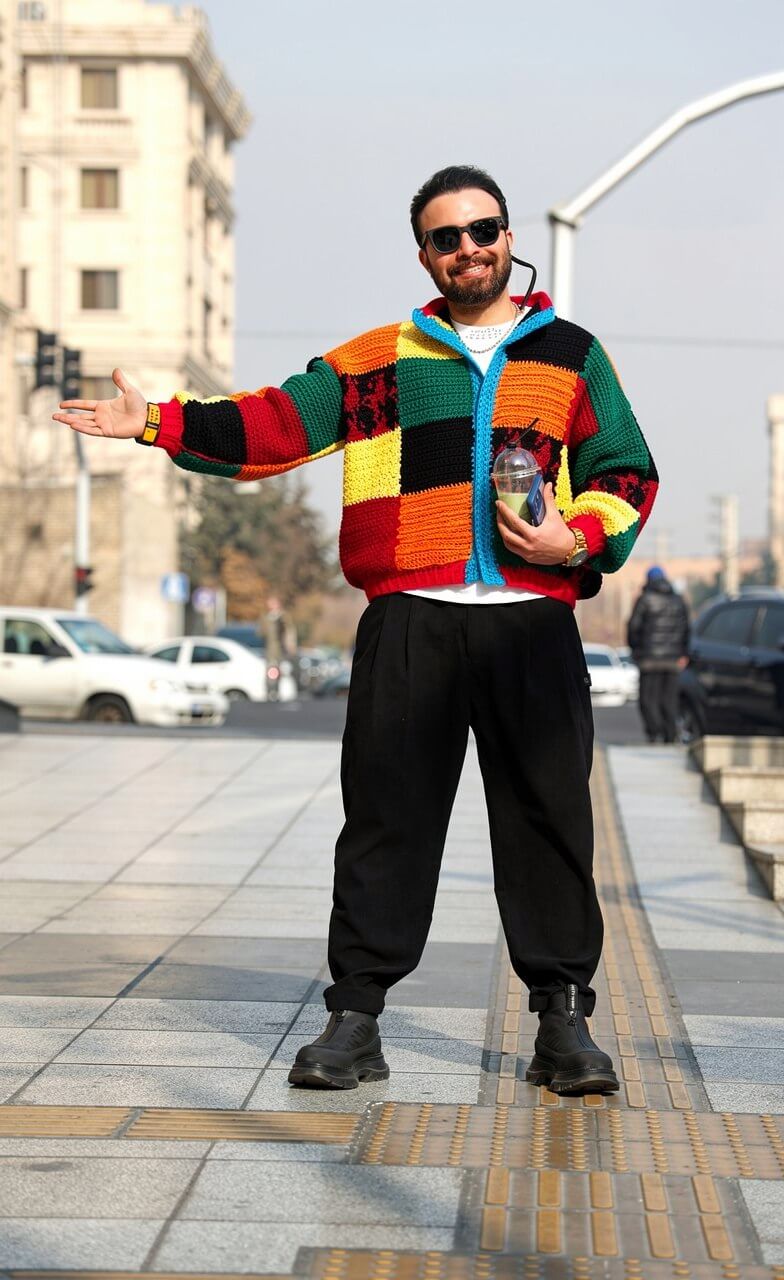
Here is the image generated above in full for you to inspect the quality.
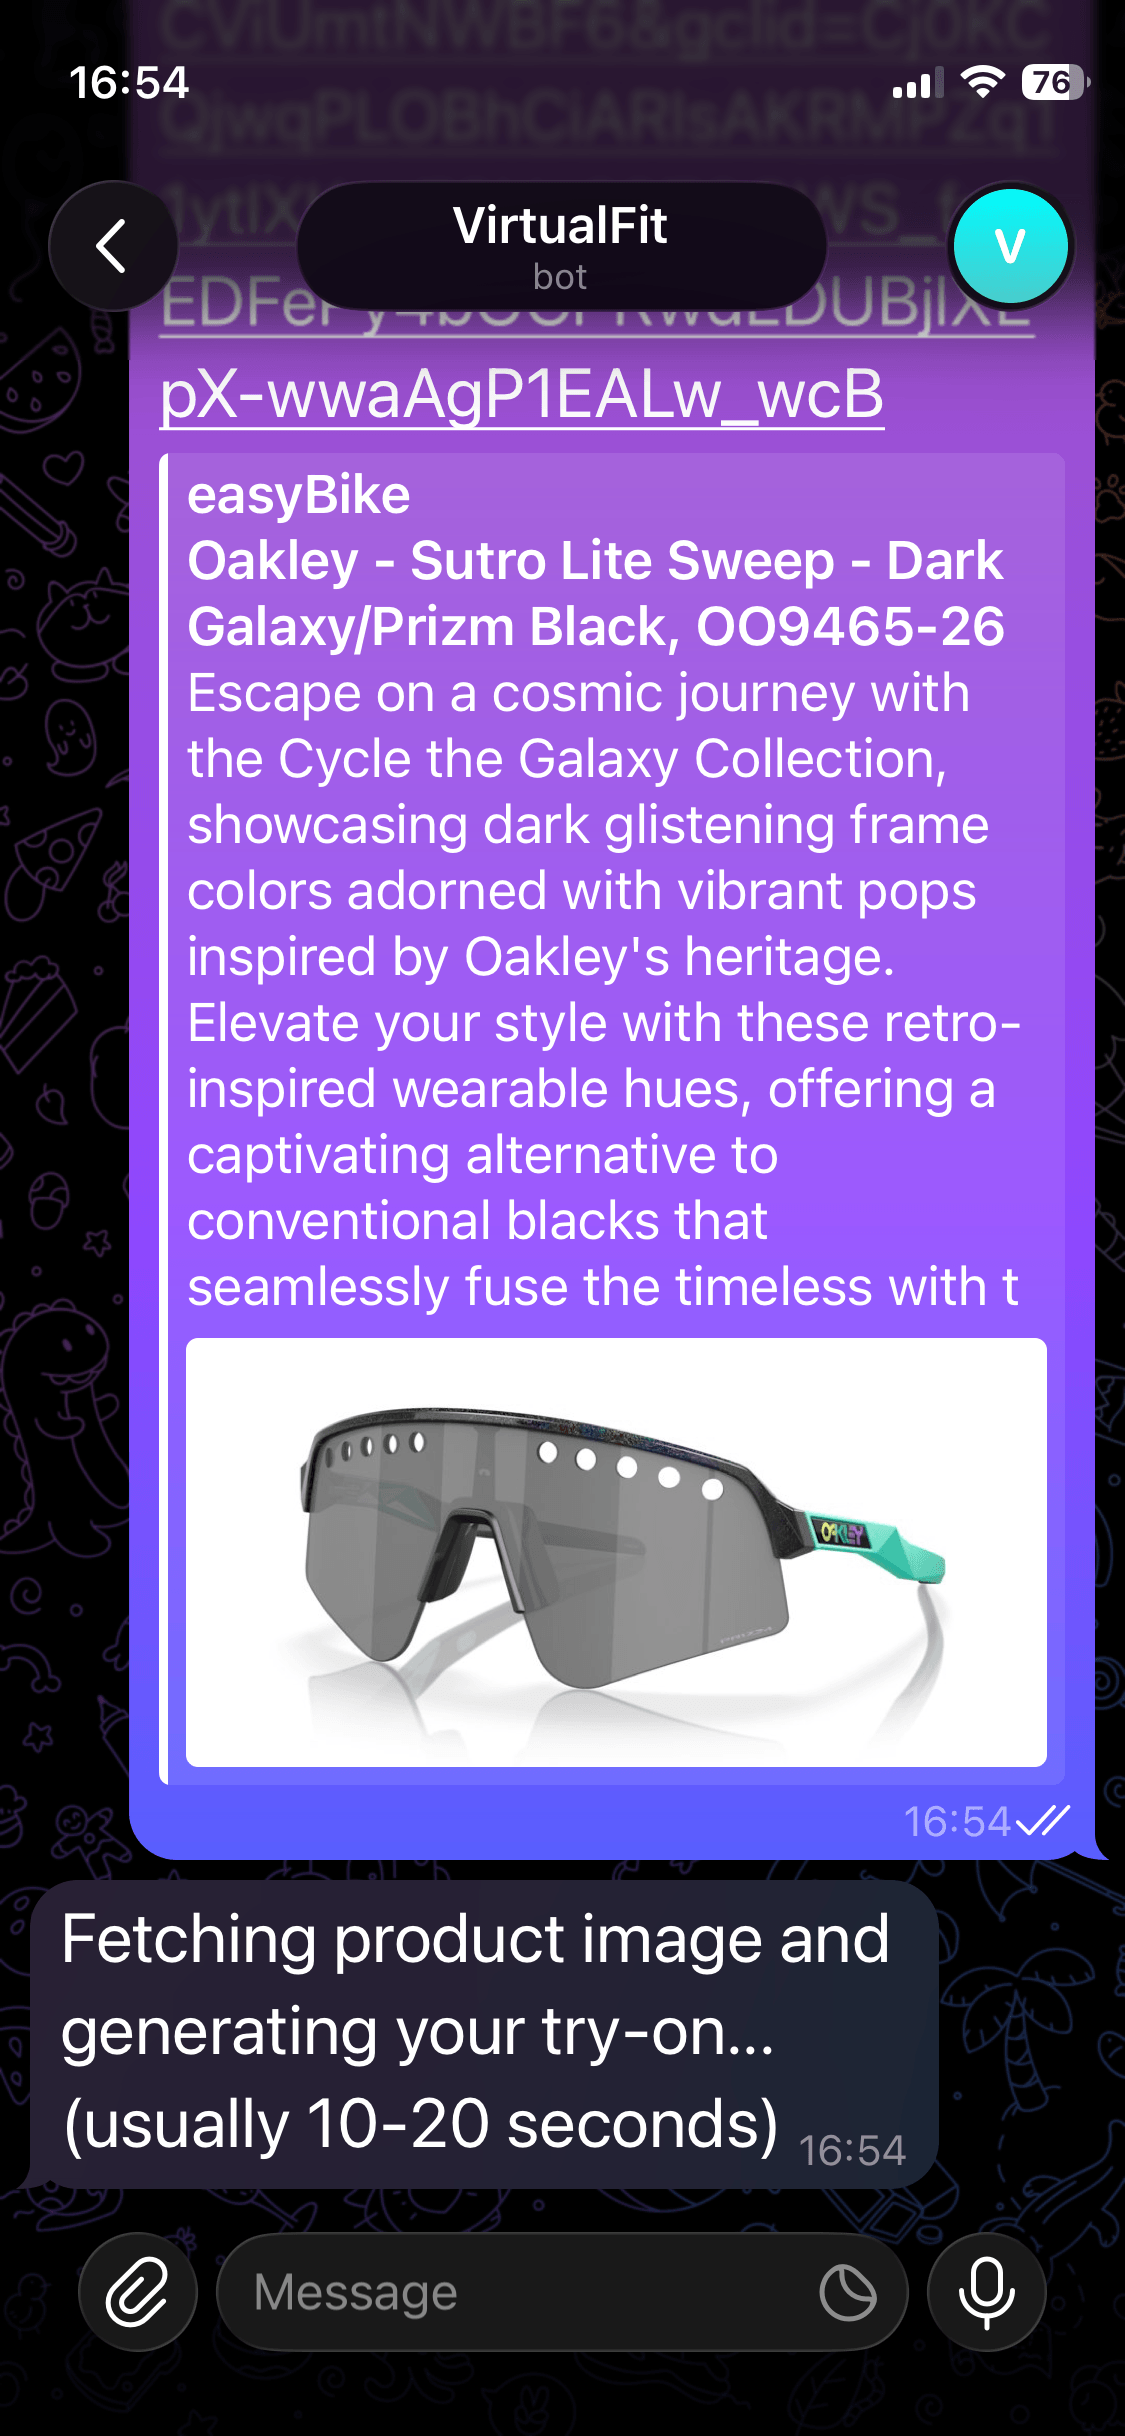
Send a Product Link
You can also send a product link. Try it by dropping a link in the chat. The bot will use the OG image as the image reference.
Here is the result.
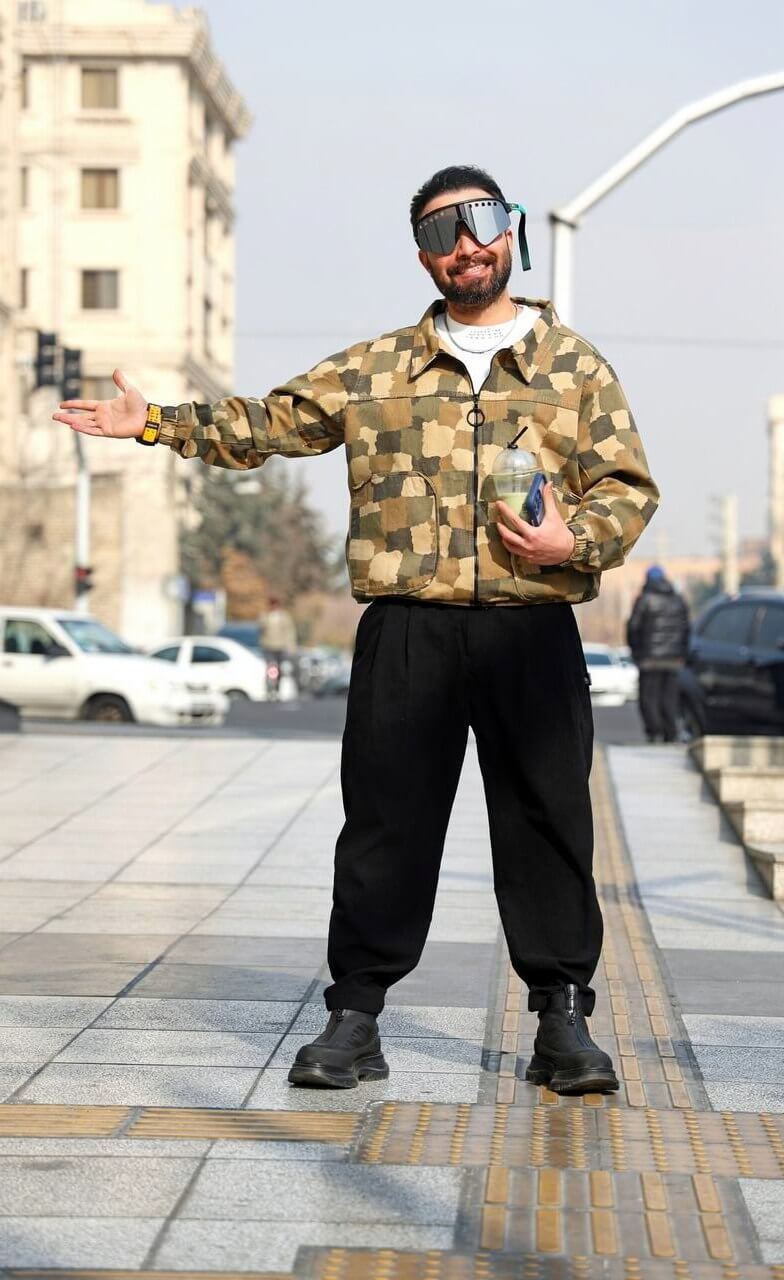
Here is the full image for you to inspect the quality.
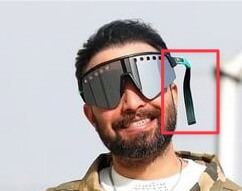
You will notice that there is a strange artifact in the sunglasses produced in this image. We can address that in the next step.
Regenerate to Fix Mistakes
Sometimes the images generated might not be perfect. As you can see here, we have a strange artifact that I believe was caused by the glasses present in the original selfie.
We can click the Regenerate button in our Telegram chat to try to recreate the image.
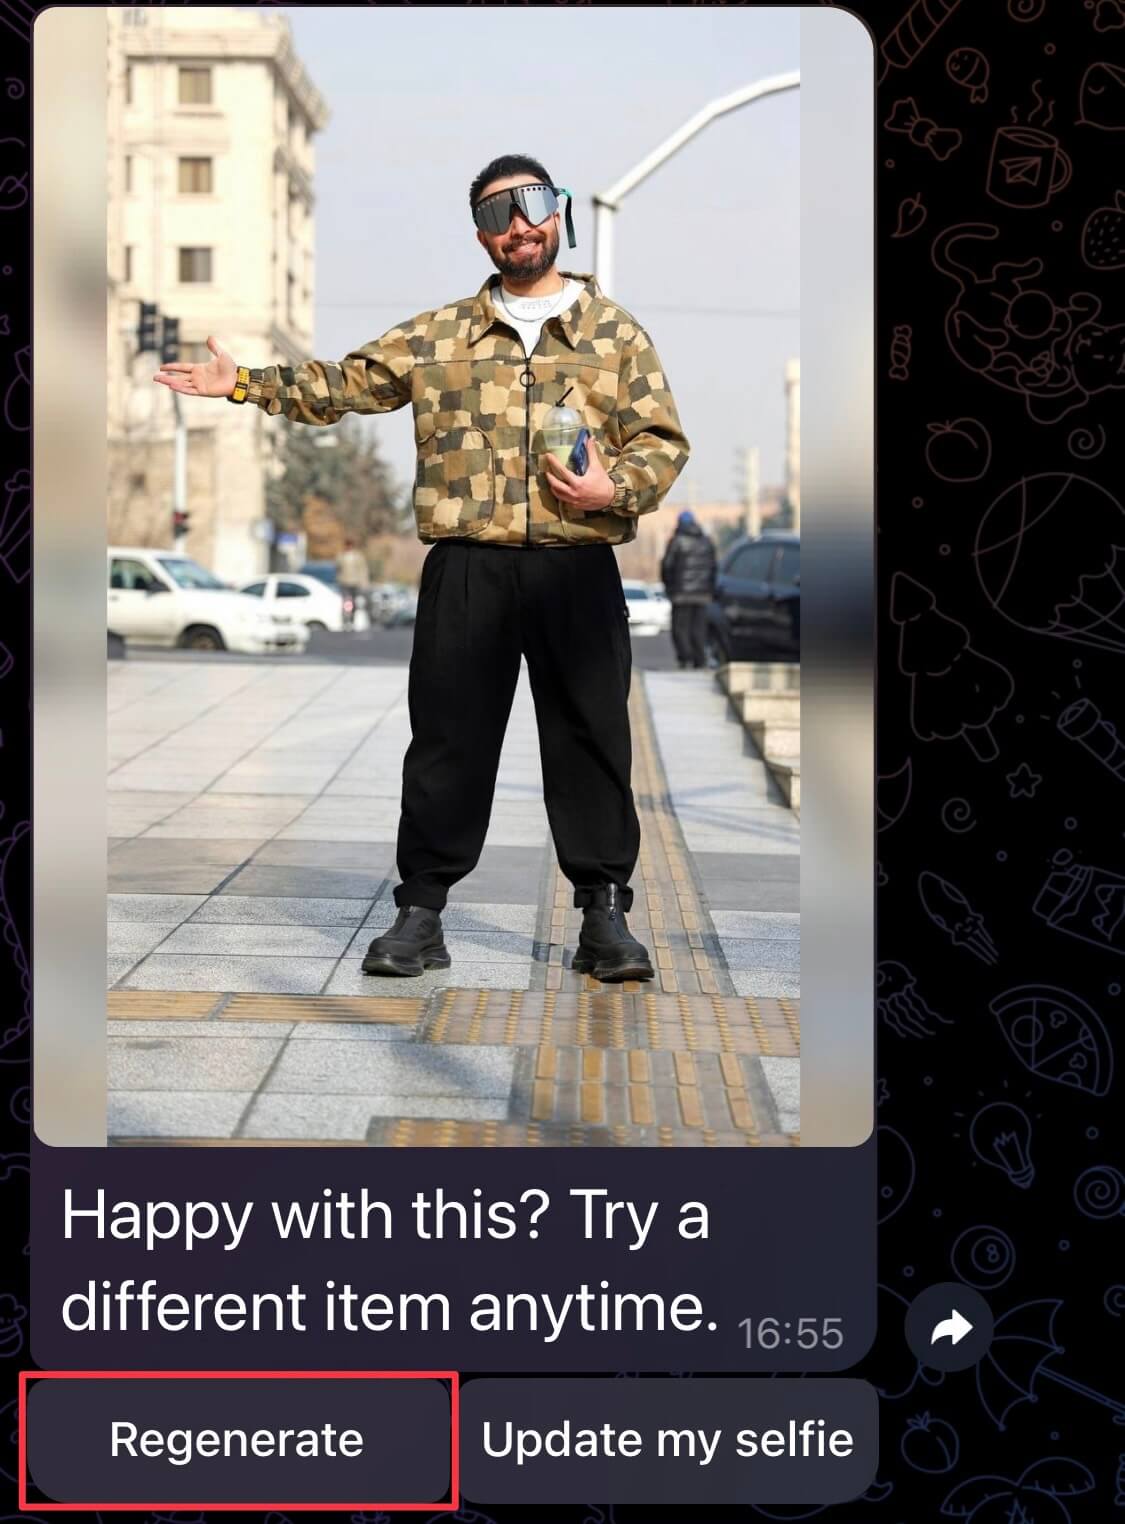
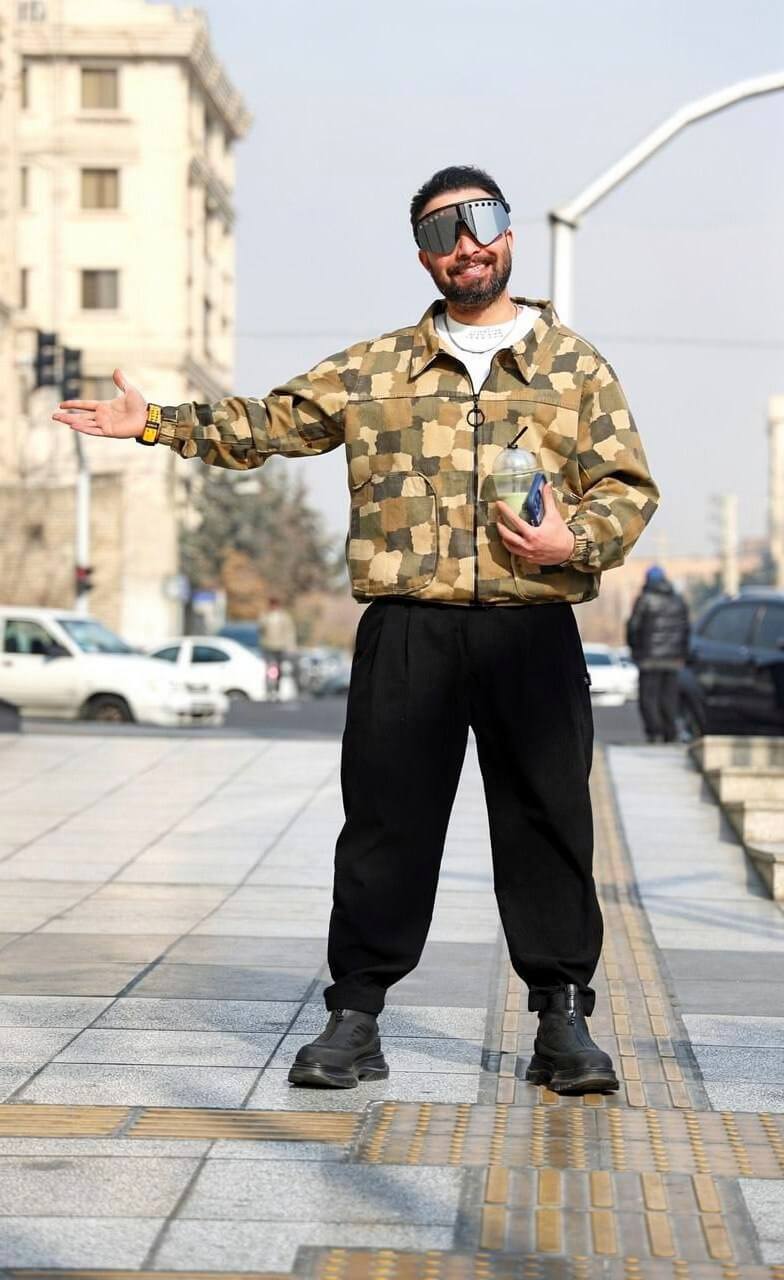
Here is our result, a regenerated image that uses a different seed.
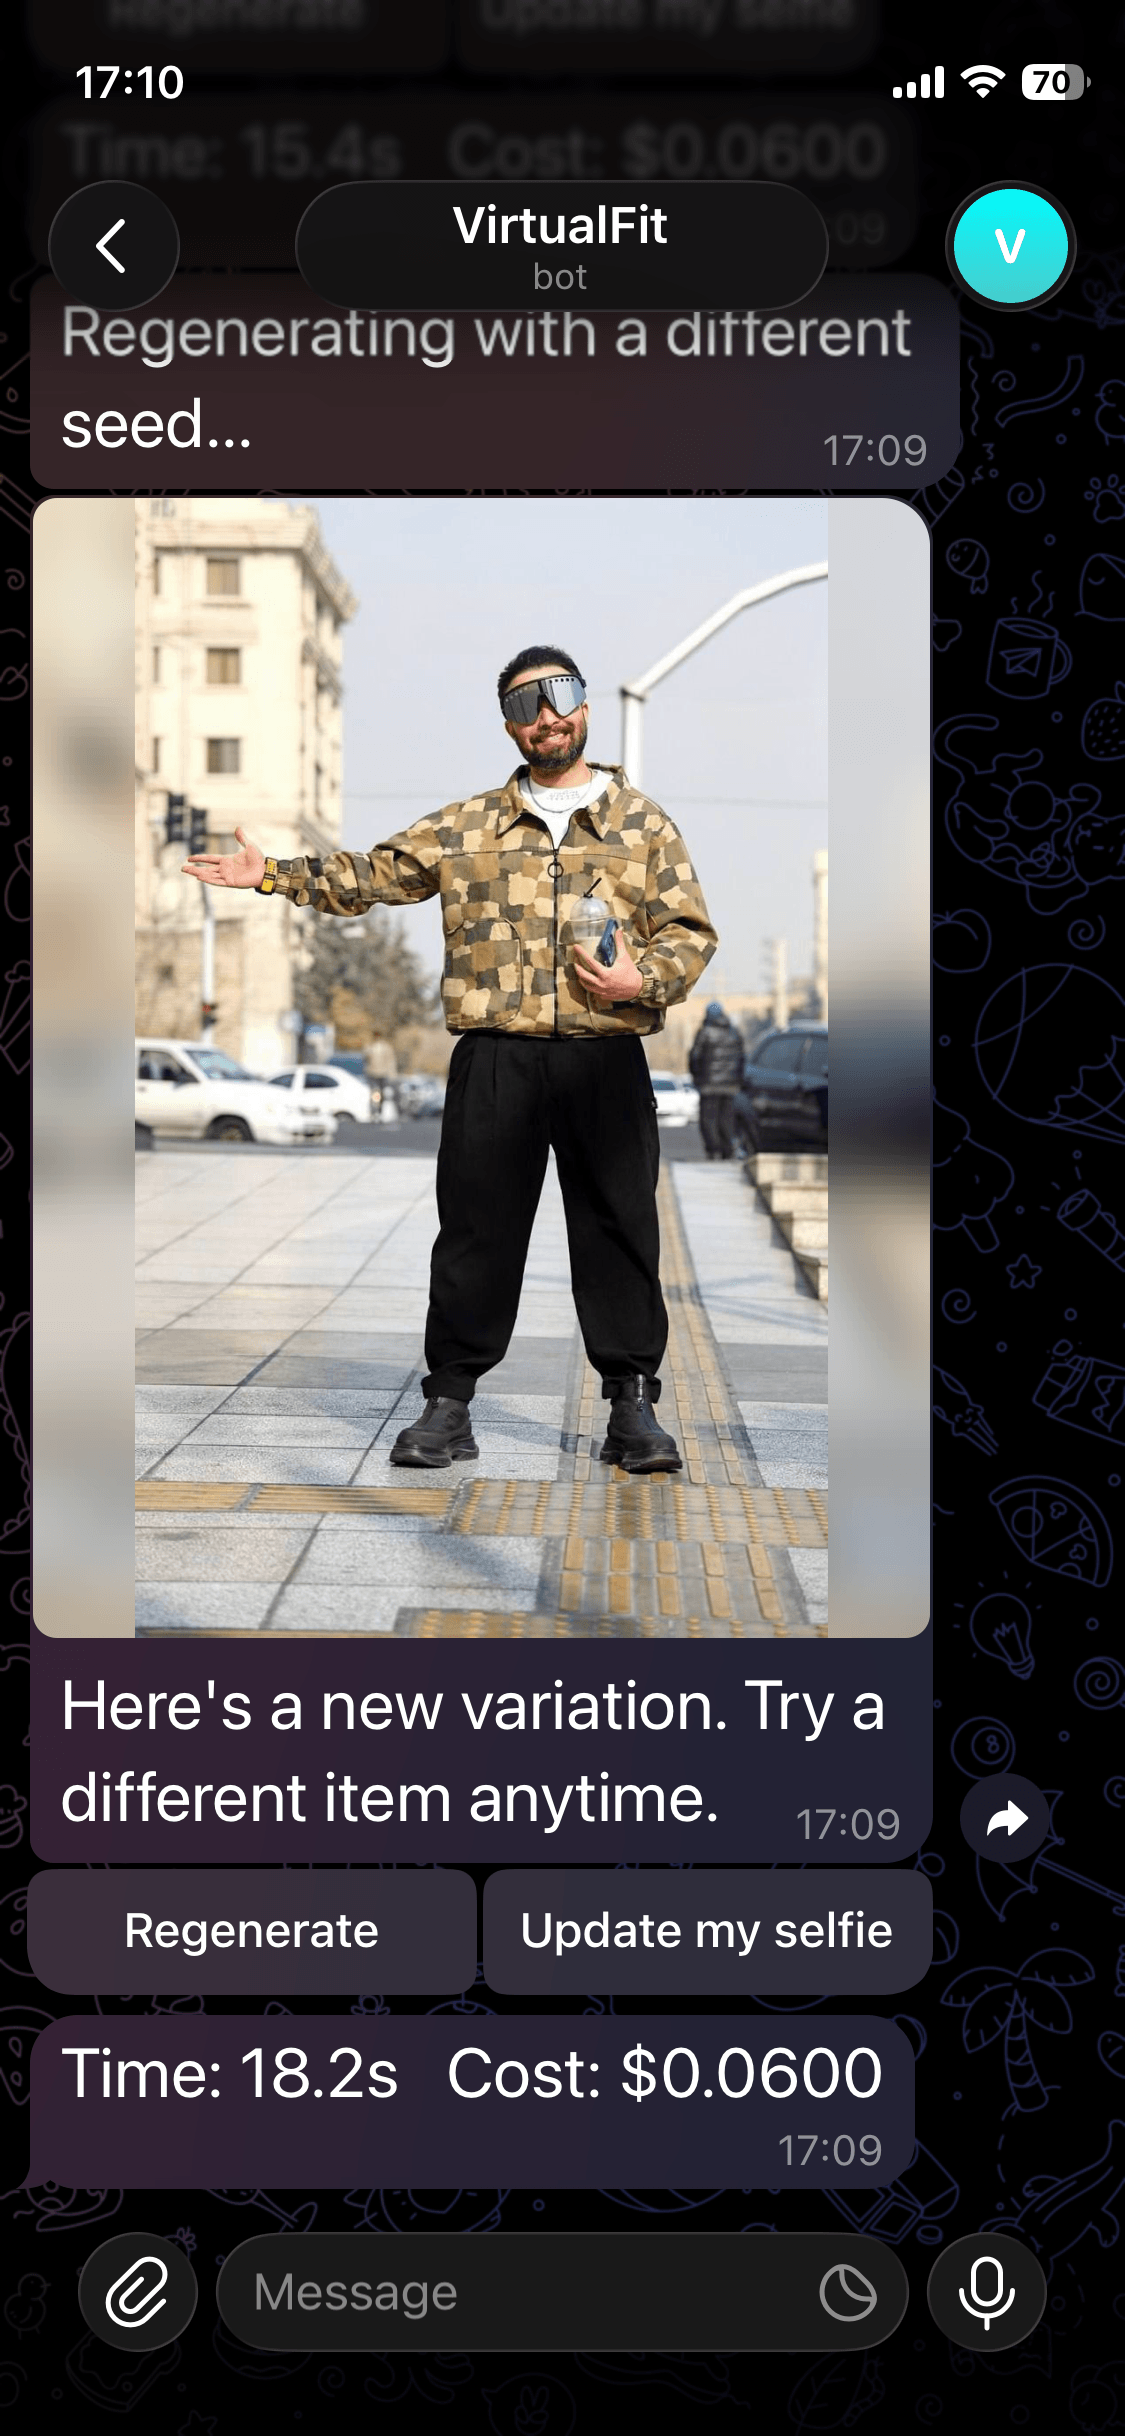
Here is the image in full for you to inspect the quality.
Update Your Reference Photo
If you'd like to help your friend try on an outfit, or see what you look like in a different environment, you can change your reference selfie by running /updateselfie.
Black Forest Labs for Image Generation
Black Forest Labs is an AI research company focused on image generation. Their FLUX model family is what powers the image generation in VirtualFit.
FLUX.2
FLUX.2 is their latest and most capable model family. It allows you to pass multiple images along with a text prompt, and produces a single generated image that blends elements from all of them according to the prompt.
Multi-Reference Image Editing
With multi-reference image editing, you can pass up to 8 reference images via the API, and the model combines elements from all of them into a single generated output.
For VirtualFit, we upload a reference selfie as the first image and a garment as the second, and pass a prompt to the model describing what we want done with them.
Model Family
FLUX.2 comes in four variants:
| Model | Best for | Starting price |
|---|---|---|
| [pro] | Production workflows, fast turnaround | $0.03/MP |
| [max] | Highest quality, grounding search | $0.07/MP |
| [flex] | Fine-grained control over steps and guidance | $0.06/MP |
| [klein] | Real-time, high-volume generation | $0.014/image |
We use FLUX.2 [pro] in VirtualFit.
Pricing
FLUX.2 uses megapixel-based pricing, so the cost scales with output resolution. In our tests, each generated image came out at $0.06.
Black Forest Labs vs Gemini
We ran some tests against BFL versus Nano Banana (gemini-2.5-flash-image) to compare quality, cost, and speed.
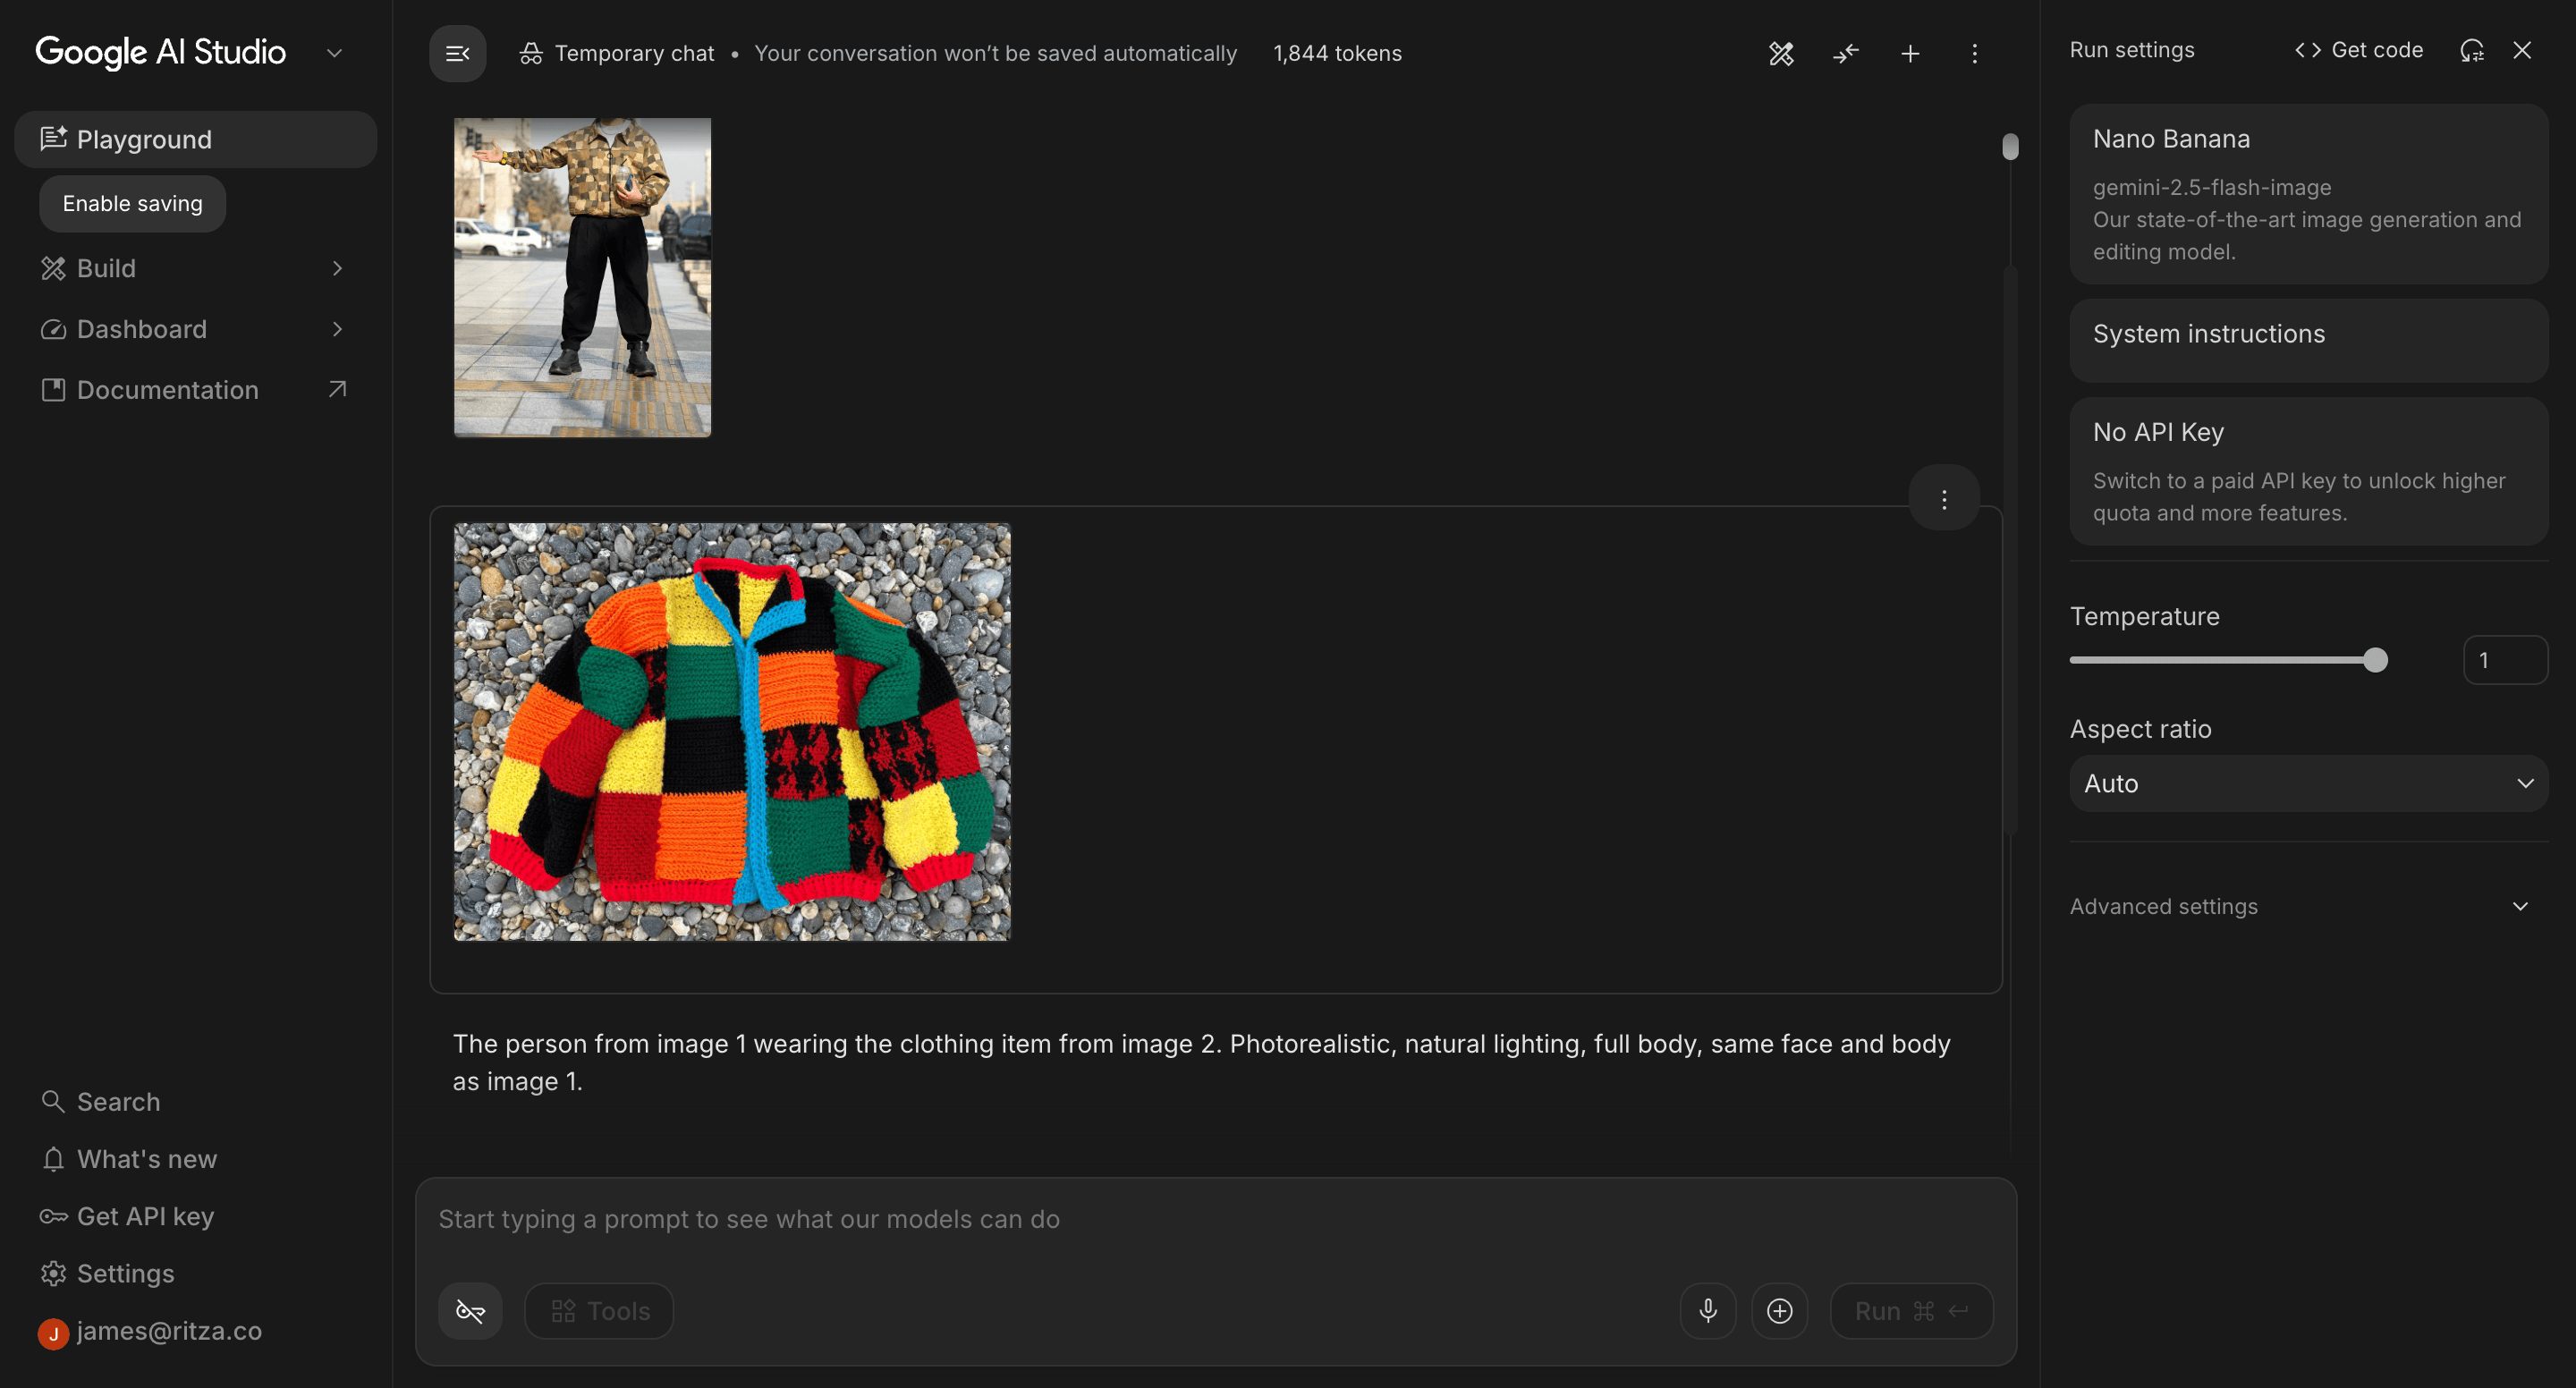
To test Gemini, we used Google AI Studio, where you can run Nano Banana for free in the browser.
We used the same selfie from our examples above, the same garment images, and the same prompt for both models.
Test 1: Complex Jacket
We used this product image of a colourful patchwork knitted jacket. The distinct colour blocks make it easy to spot inconsistencies in the output. If the model gets the pattern wrong, it will be obvious.
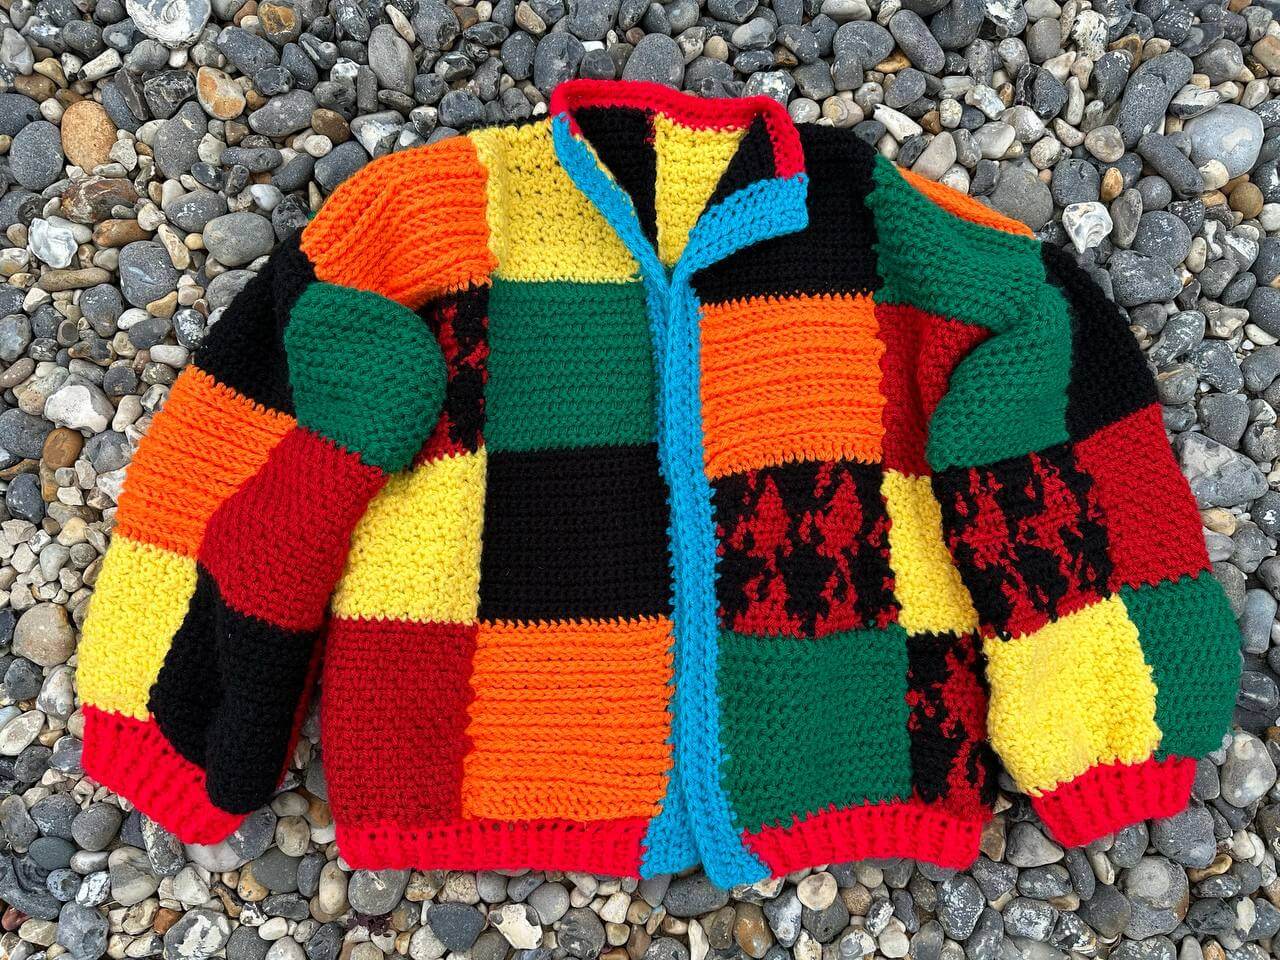
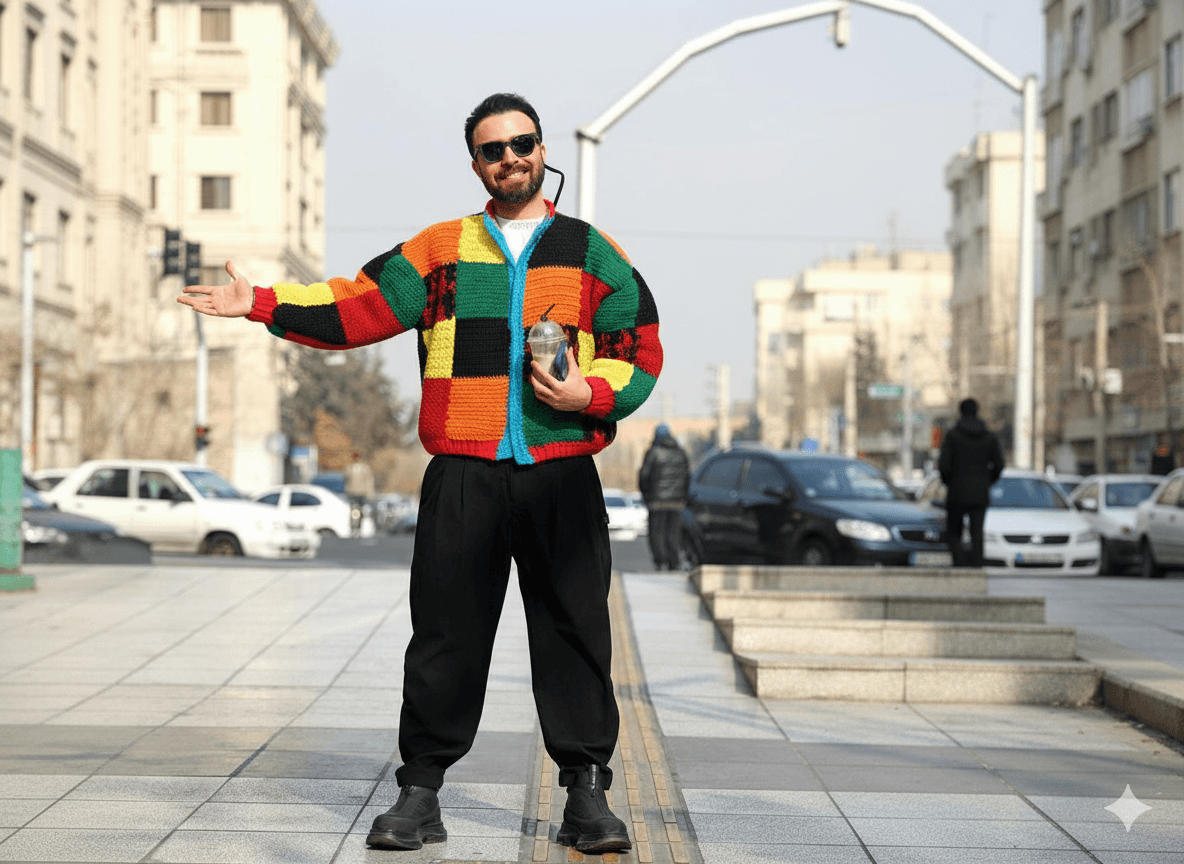
Black Forest Labs
The result is basically perfect. If you map the individual squares to the original image, you will find that all the colours and square placements are exactly as shown in the original.
Here is the full result for you to check the quality of the image.
Gemini
Gemini similarly produces a seamless result, at 35% cheaper and 27% faster.
Analysis
Both models produced a seamless result. Gemini had the advantage in price and speed.
| Black Forest Labs (FLUX.2) | Gemini (Nano Banana) | |
|---|---|---|
| Generation time | 17.3s | 12.7s |
| Cost | $0.06 | $0.039 |
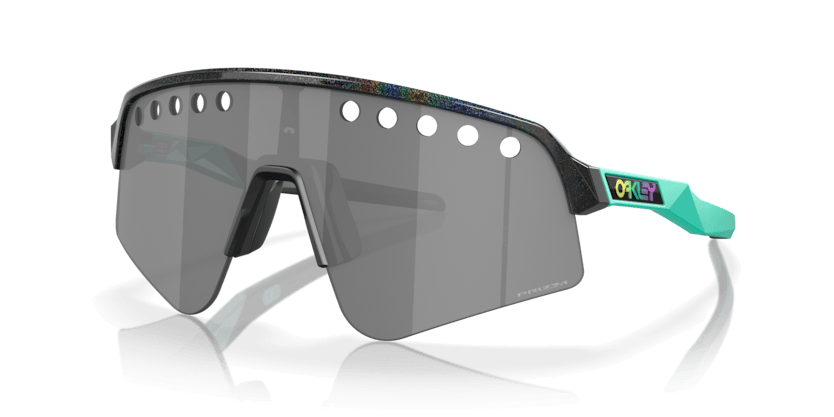
Test 2: Sunglasses (transparent image)
We used this product image of a pair of sunglasses. The image has a lot of transparency and the product is a small item with a lot of fine detail, which makes it easy to analyse the result.
Black Forest Labs
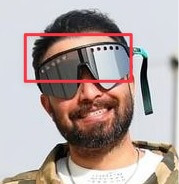
On the first attempt, BFL produced an okay result, but unfortunately with an artifact.
The original selfie had a pair of sunglasses with a strap, and the model appears to have been influenced by this, generating a strap for the new pair of sunglasses.
Tip: For best results, use a reference selfie with as few accessories as possible. Items like glasses, hats, or jewellery in the reference image can influence the generation and produce unexpected results.
However, aside from that, the glasses themselves are pretty accurate, with fine details like the holes in the lenses included.
Here is the full result for you to check the quality of the image.
Gemini
Gemini was able to produce a result with sunglasses substituted in, but if you zoom in on the glasses you can see that it generated a generic pair rather than the specific product image provided.

Here is the full result for you to check the quality of the image.

Analysis
BFL produced the stronger result here. Despite the artifact on the first attempt, it accurately reproduced the specific design of the product. Gemini applied sunglasses but ignored the product details entirely.
| Black Forest Labs (FLUX.2) | Gemini (Nano Banana) | |
|---|---|---|
| Generation time | 16.8s | 11.3s |
| Cost | $0.06 | $0.039 |
Tricky Test: Poor Quality Selfie
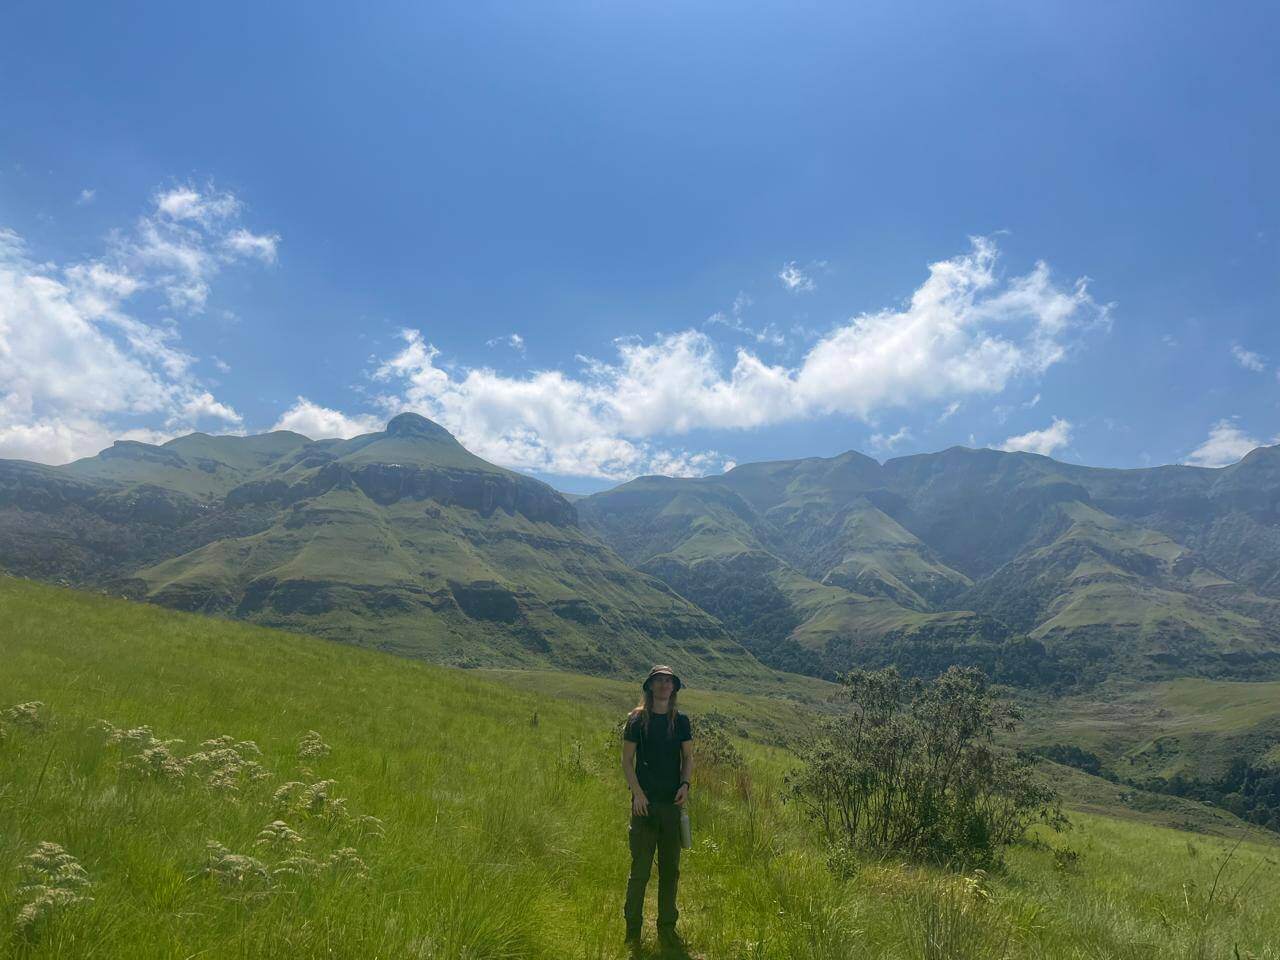
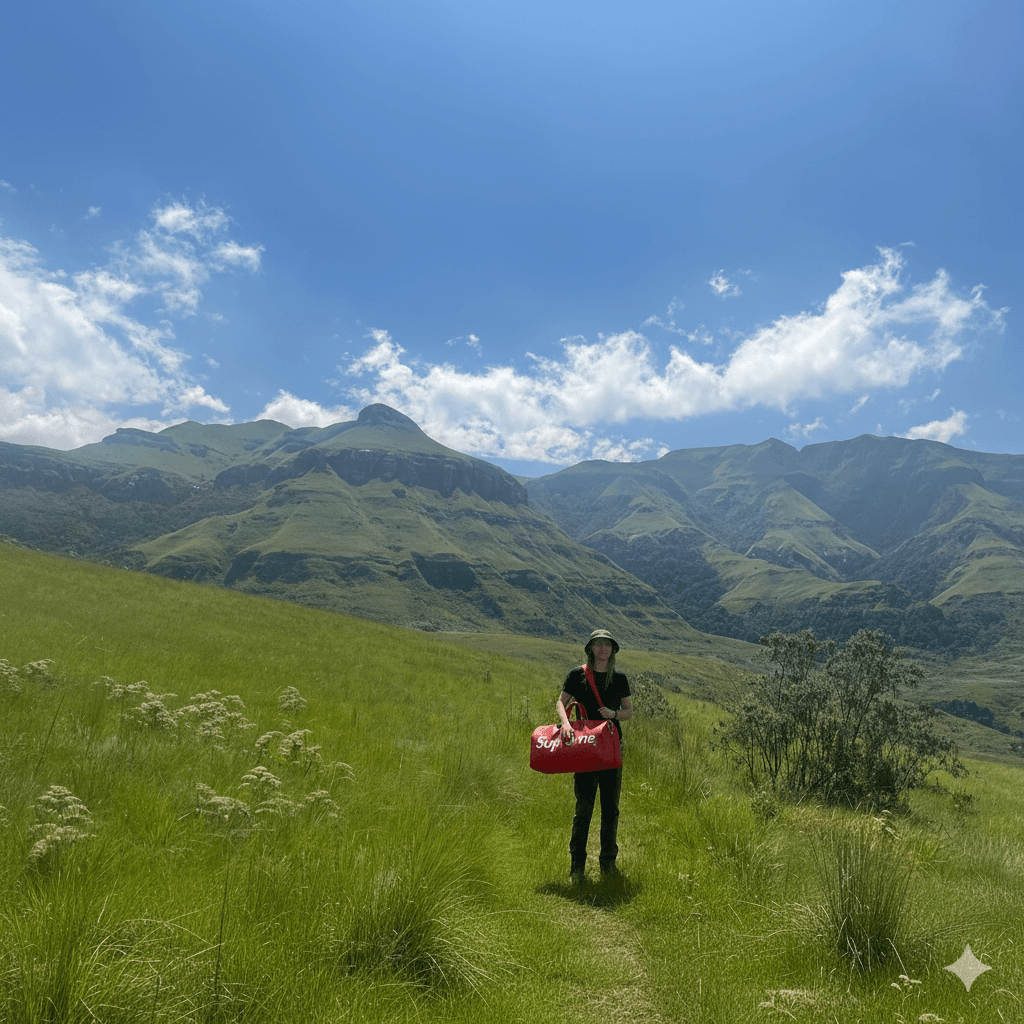
We wanted to test both models with a more difficult reference photo, where the subject is far away, the photo is taken outdoors, and the lighting is uneven.
Black Forest Labs
BFL returned an image that is almost identical in terms of composition, background, and lighting.
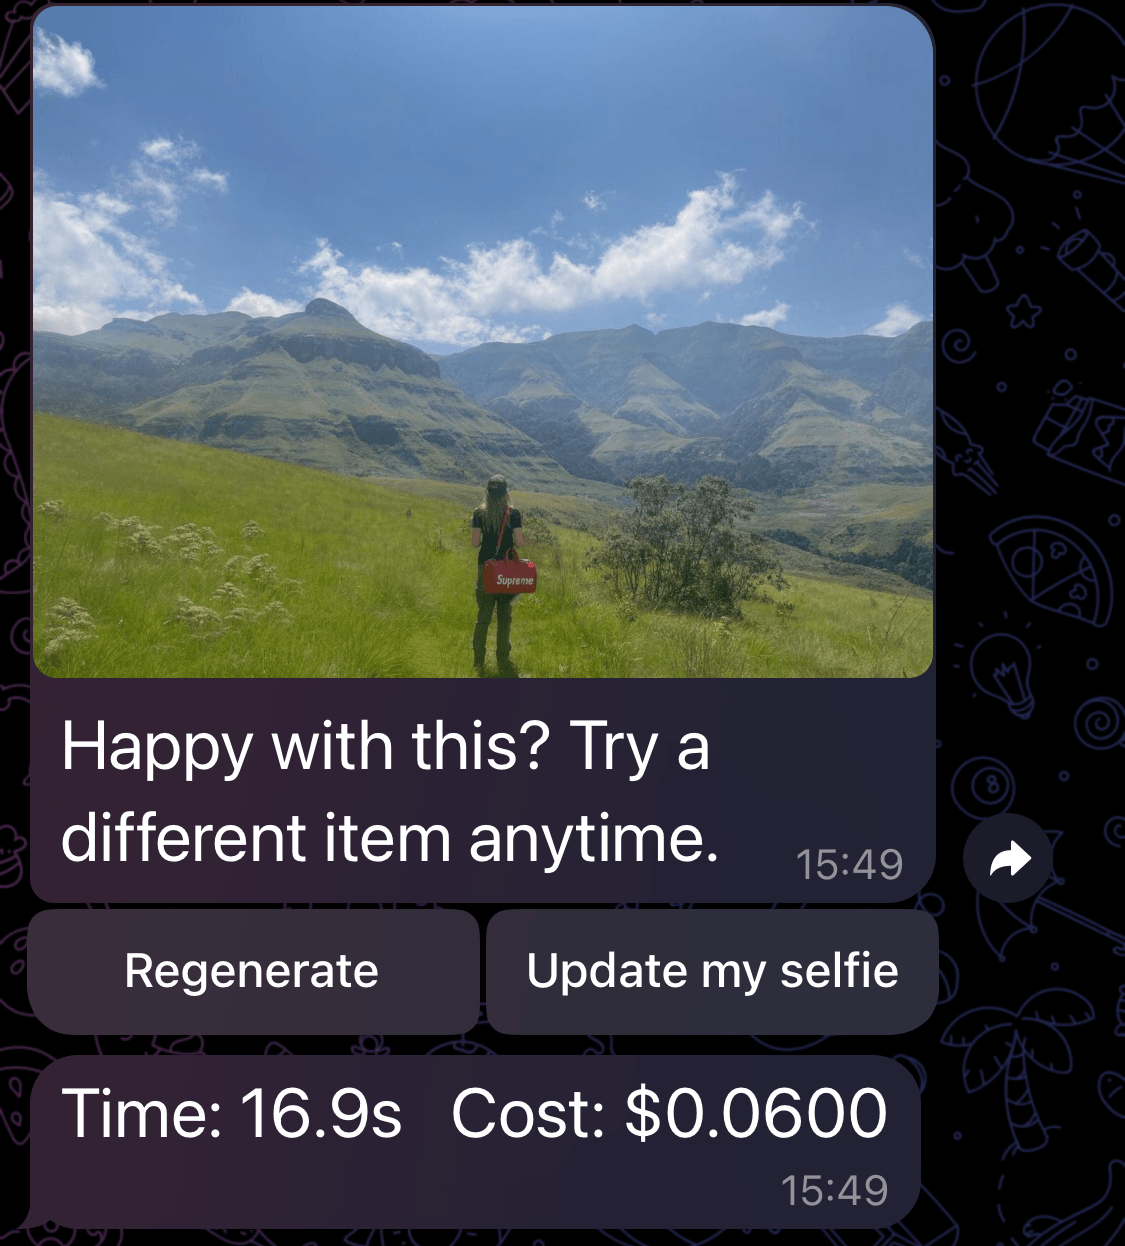
It seemed to turn the subject around, which is an interesting choice. The product placement looks perfect.
A surprising detail is that the hair is actually accurate to real life, so the model did a pretty good job filling in the blanks of the parts of the image it did not know about.
Tip: If you want to avoid the model making unexpected changes like turning the subject around, try making your prompt more specific. For example, you could add "keep the subject facing away from the camera" or "preserve the original pose and orientation".
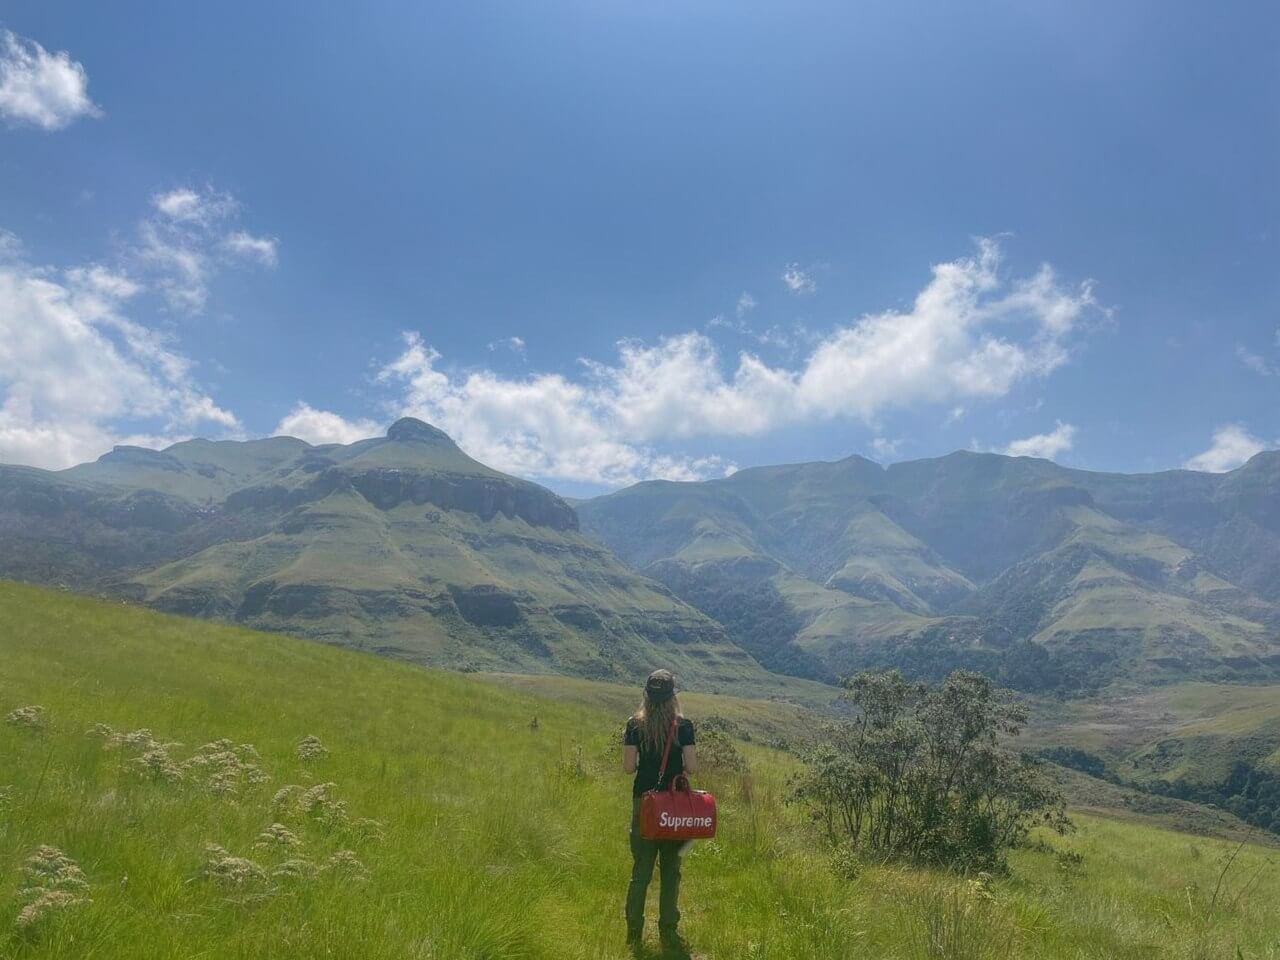
Here is the full output for you to inspect the quality.
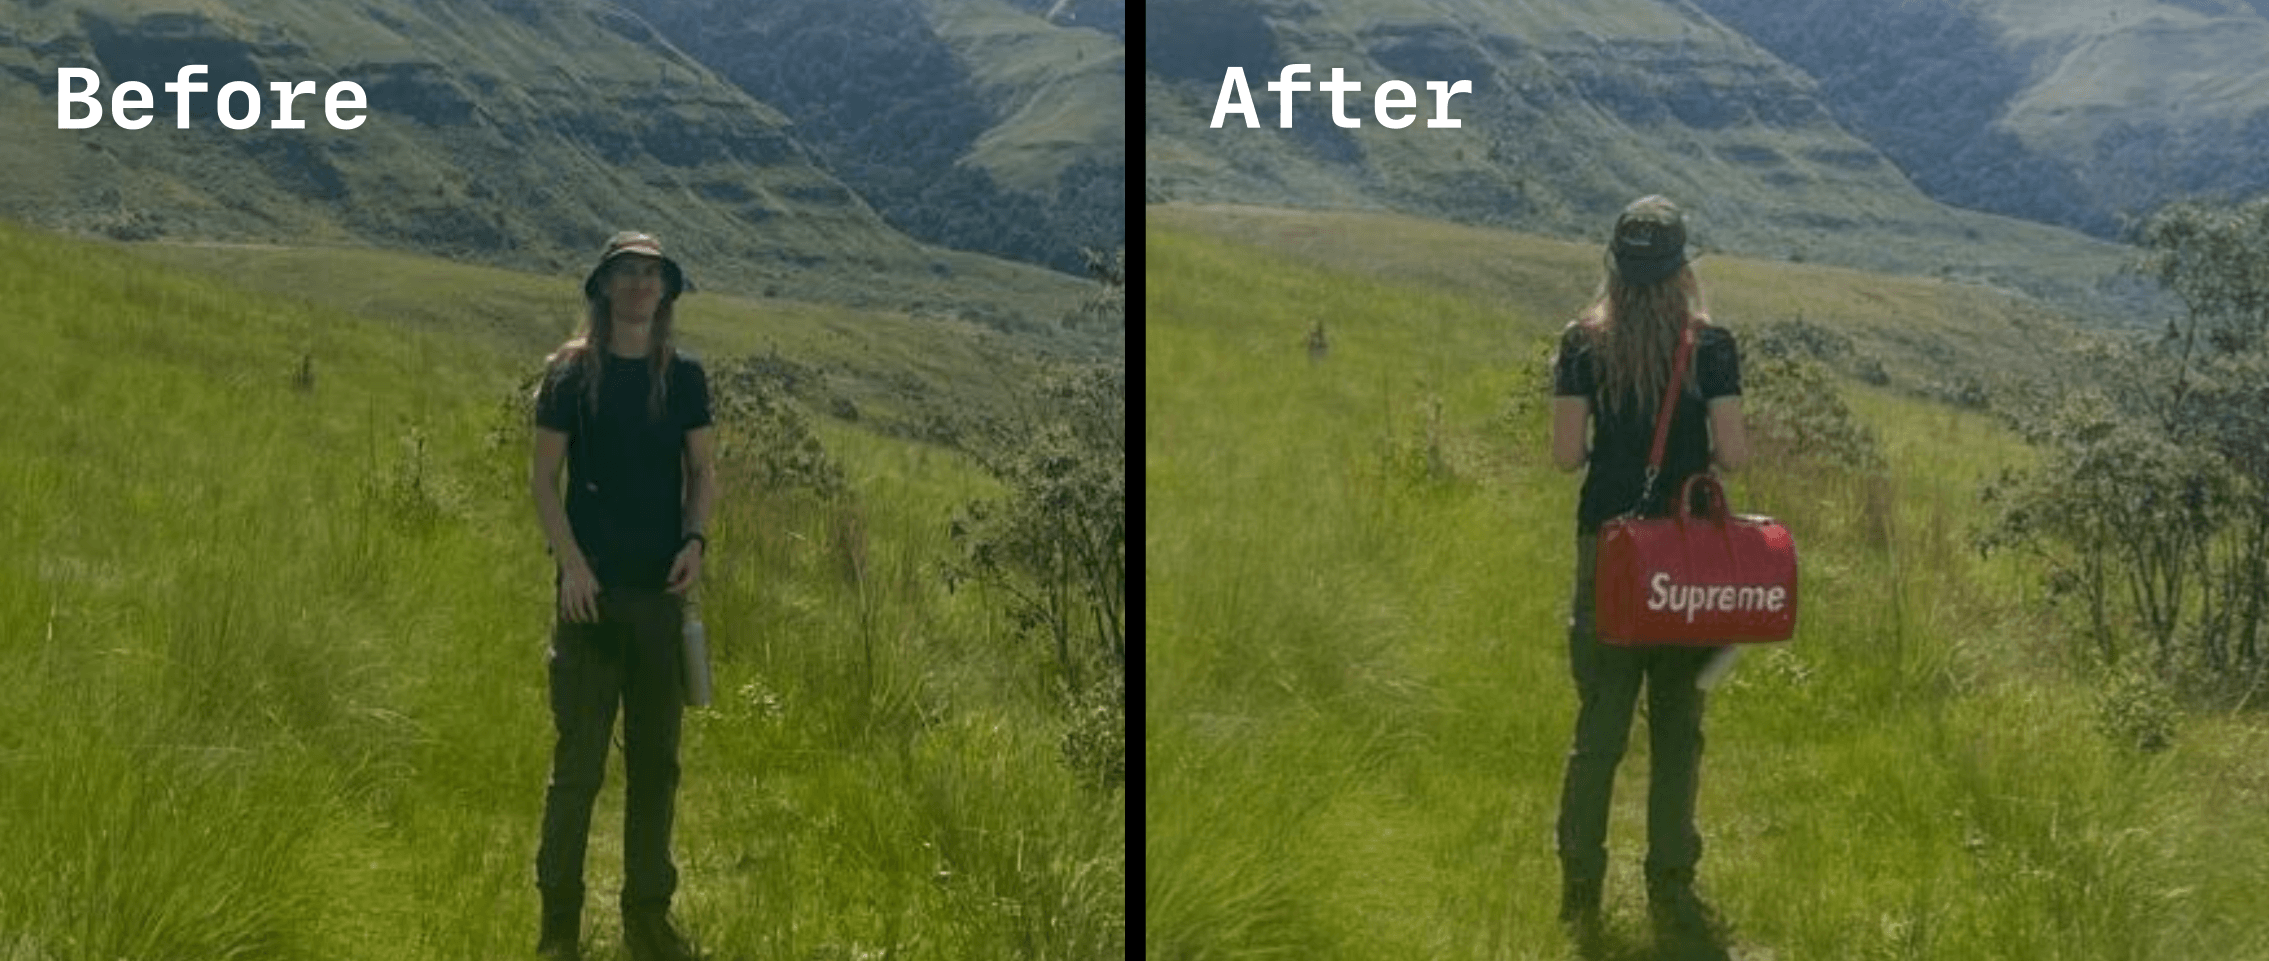
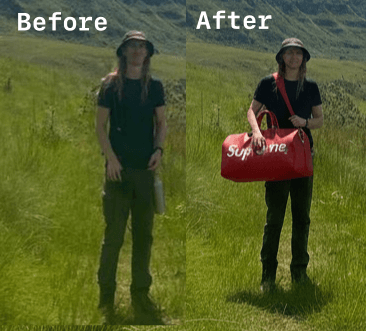
Here is the before and after.
Gemini
Gemini returned a cropped image and did a pretty good job with the product placement.
However, it did make the subject look quite strange when you zoom in. Maybe turning the subject around, as BFL chose to do, is the better approach for these distant images.
Analysis
Both models handled the product placement well despite the difficult reference image.
BFL's decision to turn the subject around produced a more usable result overall.
Gemini preserved the original orientation, which kept the composition closer to the source photo, but the subject looks unnatural when zoomed in.
Both models struggled with the difficult reference image in different ways. For the best results with either model, use a clear, well-lit selfie where the subject is facing the camera.
Tip: If your reference photo is low quality or the subject is far away, try using a clearer photo or adding more detail to your prompt about what to preserve.
| Black Forest Labs (FLUX.2) | Gemini (Nano Banana) | |
|---|---|---|
| Generation time | 16.9s | 11.1s |
| Cost | $0.06 | $0.039 |
Pricing and Performance
The table below shows list pricing alongside our measured averages from the three tests above.
| Black Forest Labs (FLUX.2) | Gemini (Nano Banana / gemini-2.5-flash-image) | |
|---|---|---|
| List price per image | ~$0.045/MP | ~$0.03/1k tokens |
| Avg. generation time (our tests) | ~16.9s | ~11.7s |
| Avg. cost per image (our tests) | $0.06 | $0.039 |
Try It Yourself
You can try this yourself by using our code in the virtualfit-telegram-bot GitHub repository, or you can follow the tutorial to see how it was built.
Prerequisites
Before you begin, make sure you have:
- Python 3.10 or higher
- A BFL account with API access. Sign up and get your API key at api.bfl.ai. Free trial credits are available.
- A Telegram account and a Telegram bot token. You can create a bot and get a token using @BotFather in Telegram.
Creating Your Accounts and Setup
Black Forest Labs
- Go to api.bfl.ai and create an account.
- Navigate to the API Keys section of your dashboard and create a new key.
- Copy the key. You will add it to your
.envfile in a later step.
Telegram
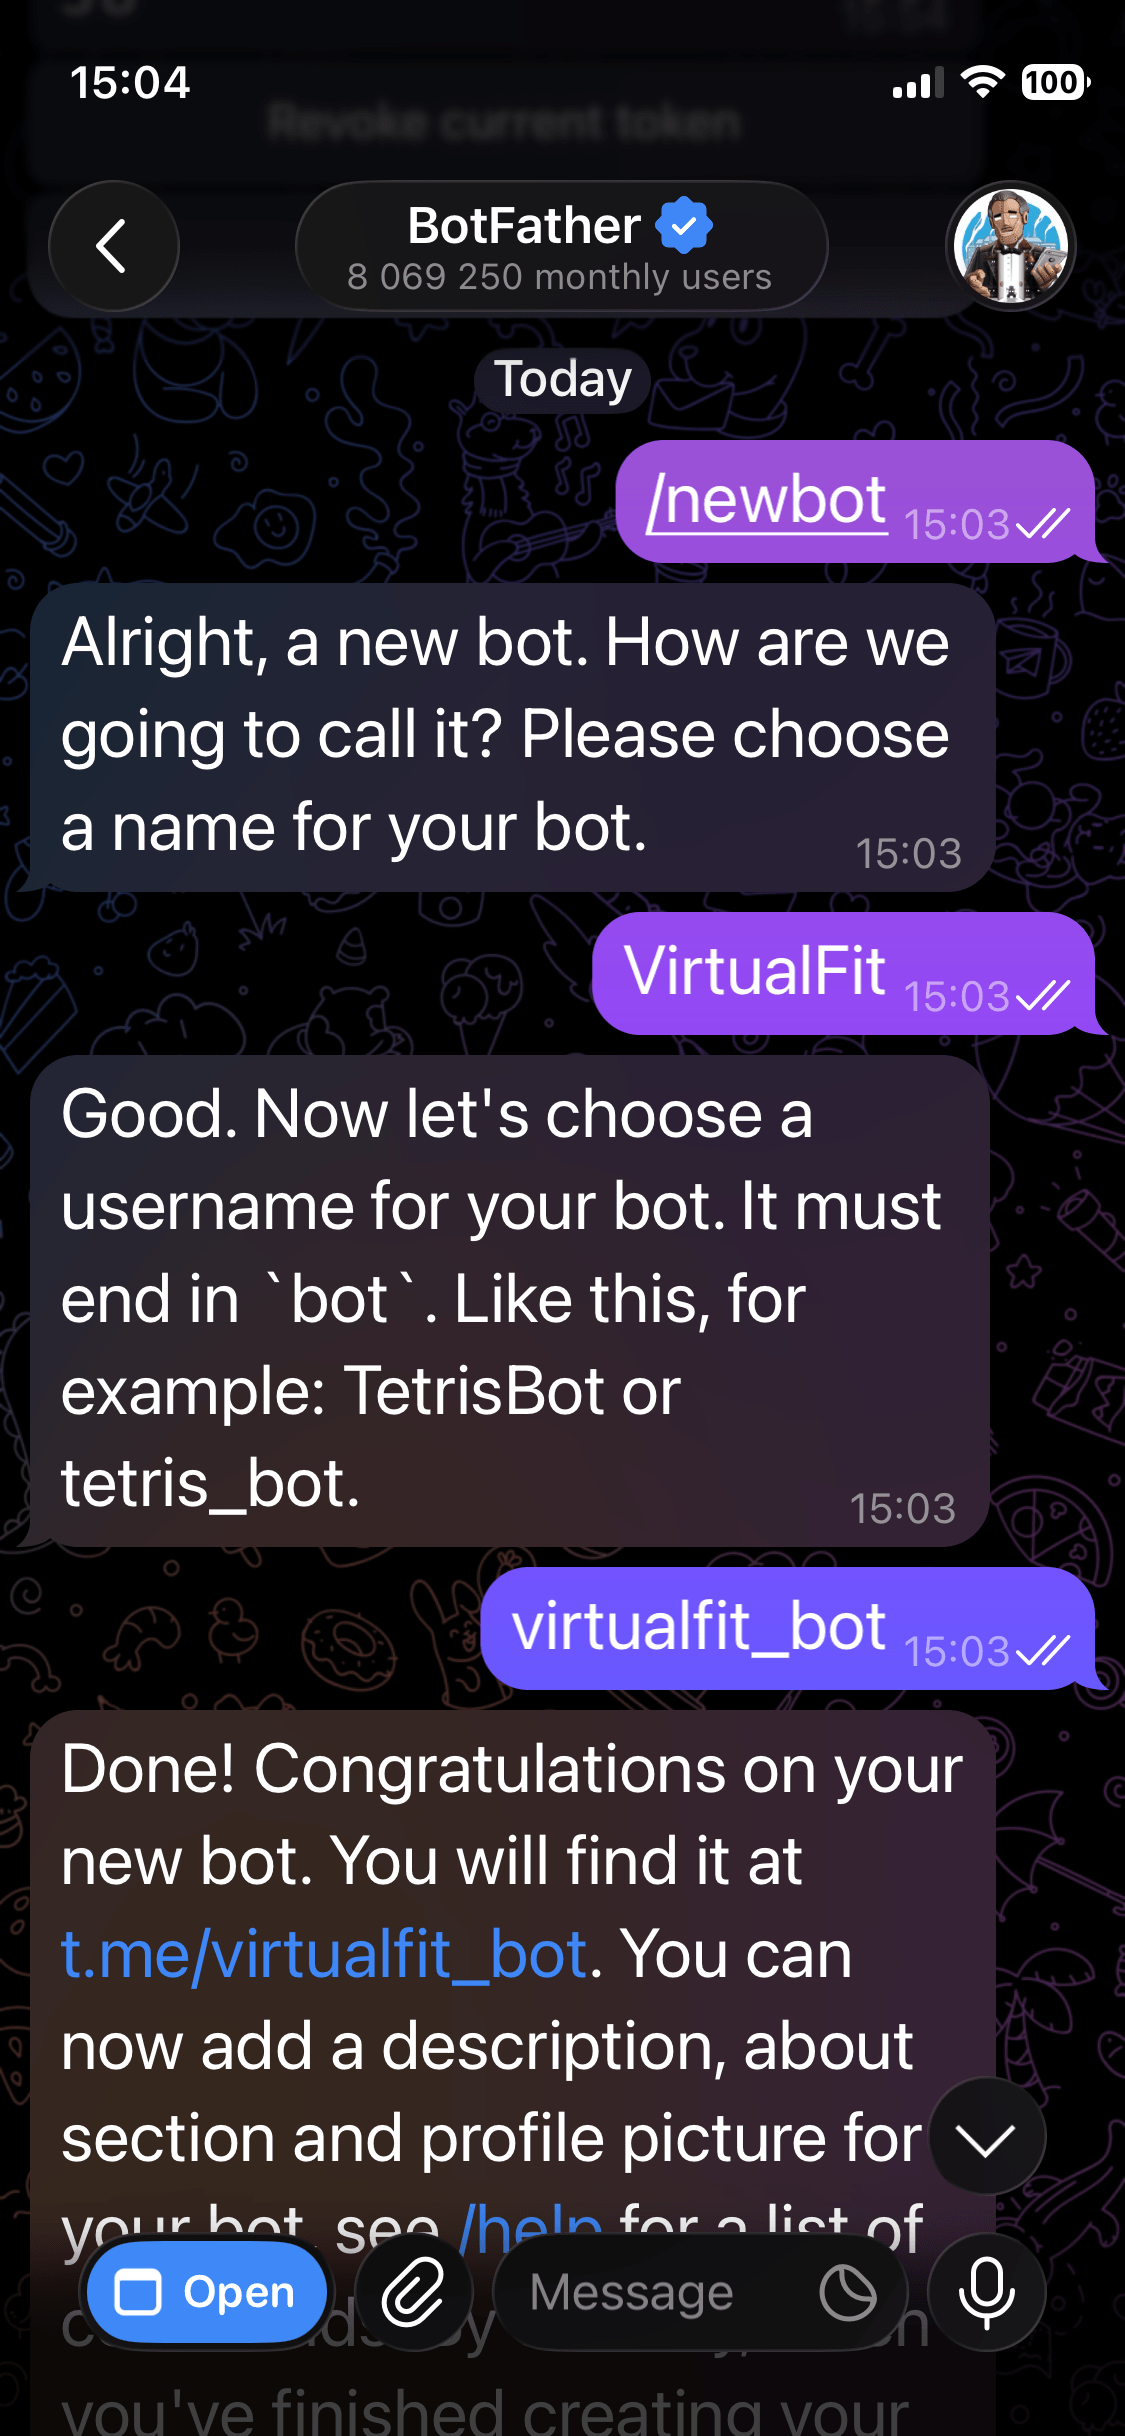
- Open Telegram and search for @BotFather.
- Start a chat and send
/newbot. - Follow the prompts to choose a name and username for your bot.
- BotFather will give you an API token. Copy it. You will add it to your
.envfile in a later step.
Clone the Repository
Clone the virtualfit-telegram-bot repository to your local machine:
git clone https://github.com/jamesdanielwhitford/virtualfit-telegram-bot.git
cd virtualfit-telegram-bot
Install and Run the Bot
Copy the environment variables template and populate it with your API keys:
cp .env.example .env
Open .env and replace the placeholder values with your BFL API key and Telegram bot token. Then install the dependencies:
pip install -r requirements.txt
Run the bot:
python bot.py
Using the Bot
Once the script is running, open Telegram and search for your bot by the username you set with BotFather. Send /start to begin. The bot will ask for a selfie first, then accept product photos or URLs to generate try-on images.
The bot supports the following commands:
/start- start or restart a conversation/myselfie- view your currently saved reference photo/updateselfie- replace your reference photo with a new one/help- show available commands and tips for best results
After each try-on image is generated, the bot also shows two inline buttons: Regenerate to get a new variation of the same item, and Update my selfie to swap your reference photo.
Follow the Tutorial
If you want to build this yourself, you can continue reading to follow the tutorial in the next section.
Building the Bot
The rest of this guide will walk you through building the VirtualFit Telegram bot step by step.
Project Structure
The bot lives in a single Python file alongside a dependencies file and an environment variables template:
/
├── bot.py
├── requirements.txt
├── .env
└── users/
Create the files and directory structure with this command:
touch bot.py requirements.txt .env && mkdir -p users
Install Dependencies
Create a requirements.txt file with the following contents:
python-telegram-bot==21.6
httpx>=0.28.1
python-dotenv==1.0.1
Then install:
pip install -r requirements.txt
Set Up Environment Variables
Create a .env file in the project root:
TELEGRAM_BOT_TOKEN=your_telegram_bot_token_here
BFL_API_KEY=your_bfl_api_key_here
Populate these with the tokens and API keys you received in the Creating Your Accounts and Setup step.
Create bot.py
Create bot.py and start with the imports and configuration:
import asyncio
import base64
import json
import os
import time
from html.parser import HTMLParser
from pathlib import Path

import httpx
from dotenv import load_dotenv
from telegram import InlineKeyboardButton, InlineKeyboardMarkup, Update
from telegram.ext import (
    Application,
    CallbackQueryHandler,
    CommandHandler,
    ContextTypes,
    MessageHandler,
    filters,
)

load_dotenv()

TELEGRAM_BOT_TOKEN = os.environ["TELEGRAM_BOT_TOKEN"]
BFL_API_KEY = os.environ["BFL_API_KEY"]
BFL_ENDPOINT = "https://api.bfl.ai/v1/flux-2-pro"

USERS_DIR = Path("users")
USERS_DIR.mkdir(exist_ok=True)
USERS_FILE = Path("users.json")
load_dotenv() reads the .env file and makes the values available via os.environ. The USERS_DIR is where reference selfies are stored, keyed by Telegram user ID.
Managing User State
The bot stores each user's reference selfie on disk, identified by their Telegram user ID. Add these helper functions:
def load_users() -> dict:
    if USERS_FILE.exists():
        return json.loads(USERS_FILE.read_text())
    return {}


def save_users(users: dict) -> None:
    USERS_FILE.write_text(json.dumps(users))


def get_selfie_path(user_id: int) -> Path:
    return USERS_DIR / f"{user_id}.jpg"


def has_selfie(user_id: int) -> bool:
    return get_selfie_path(user_id).exists()


def save_selfie(user_id: int, data: bytes) -> None:
    get_selfie_path(user_id).write_bytes(data)


def get_selfie_b64(user_id: int) -> str:
    return base64.b64encode(get_selfie_path(user_id).read_bytes()).decode()


PENDING_SELFIE_UPDATE: set[int] = set()
PENDING_SELFIE_UPDATE is an in-memory set that tracks which users have asked to replace their selfie via the /updateselfie command. When that user next sends a photo, the bot treats it as a new reference rather than a garment.
Scraping Product Images from URLs
Users can paste a product URL instead of uploading a photo directly. The bot extracts the og:image meta tag from the page and uses that image for the try-on. Add this parser and scraping function:
class OGImageParser(HTMLParser):
    def __init__(self):
        super().__init__()
        self.og_image: str | None = None

    def handle_starttag(self, tag, attrs):
        if tag == "meta":
            attrs_dict = dict(attrs)
            if attrs_dict.get("property") == "og:image":
                self.og_image = attrs_dict.get("content")


def scrape_og_image(url: str) -> bytes | None:
    try:
        resp = httpx.get(url, follow_redirects=True, timeout=10)
        resp.raise_for_status()
        parser = OGImageParser()
        parser.feed(resp.text)
        if parser.og_image:
            img_resp = httpx.get(parser.og_image, follow_redirects=True, timeout=10)
            img_resp.raise_for_status()
            return img_resp.content
    except Exception:
        return None
    return None
OGImageParser extends Python's built-in HTMLParser to find the og:image meta tag. Most e-commerce product pages include this tag with a clean product image, making it a reliable way to grab a garment photo without requiring users to save and re-upload images.
Calling the BFL API
This is the core of the bot. The run_tryon function sends the selfie and garment image to the FLUX.2 API and polls for the result:
def run_tryon(selfie_b64: str, garment_b64: str, seed: int | None = None) -> tuple[bytes, float, float]:
    start = time.time()
    payload = {
        "prompt": (
            "The person from image 1 wearing the clothing item or accessory from image 2. "
            "Photorealistic, natural lighting, full body, same face and body as image 1."
        ),
        "input_image": selfie_b64,
        "input_image_2": garment_b64,
    }
    if seed is not None:
        payload["seed"] = seed

    resp = httpx.post(
        BFL_ENDPOINT,
        json=payload,
        headers={"x-key": BFL_API_KEY},
        timeout=30,
    )
    resp.raise_for_status()
    data = resp.json()
    polling_url = data["polling_url"]
    cost_credits = data.get("cost", 0)
    cost_usd = cost_credits / 100

    for _ in range(120):
        result = httpx.get(polling_url, headers={"x-key": BFL_API_KEY}, timeout=10).json()
        status = result.get("status")
        if status == "Ready":
            image_url = result["result"]["sample"]
            image = httpx.get(image_url, timeout=30).content
            elapsed = time.time() - start
            return image, elapsed, cost_usd
        time.sleep(1)
        if status in ("Error", "Request Moderated", "Content Moderated"):
            raise RuntimeError(f"BFL generation failed: {status}")

    raise TimeoutError("BFL generation timed out after 120 seconds")
The prompt references image 1 and image 2 explicitly because the FLUX.2 API assigns those labels to input_image and input_image_2 in the order they appear in the payload. Using those labels in the prompt text tells the model which image is the person and which is the garment.
The BFL API is asynchronous: the initial POST returns immediately with a polling_url rather than the finished image. The loop calls that URL once per second for up to 120 seconds until the status is Ready, at which point the result contains a signed URL to download the image from. If the status comes back as Error, Request Moderated, or Content Moderated, the loop raises immediately rather than waiting out the full timeout.
The optional seed parameter controls the random noise used during generation. Omitting it lets the API pick a seed, producing a different result each time. Passing a fixed seed gives a reproducible result. Here the regenerate button passes int(time.time()) as the seed, which guarantees a different image each press while still being deterministic if you wanted to reproduce it.
Building the Inline Keyboard
After a try-on image is sent, the bot attaches an inline keyboard with two buttons: one to regenerate with a different seed, and one to update the reference selfie:
def tryon_keyboard() -> InlineKeyboardMarkup:
    return InlineKeyboardMarkup([
        [
            InlineKeyboardButton("Regenerate", callback_data="regenerate"),
            InlineKeyboardButton("Update my selfie", callback_data="update_selfie"),
        ]
    ])
Adding the Command Handlers
Add handlers for the four bot commands:
async def cmd_start(update: Update, context: ContextTypes.DEFAULT_TYPE) -> None:
    user_id = update.effective_user.id
    if has_selfie(user_id):
        await update.message.reply_text(
            "Welcome back! Send me a photo of a clothing item or accessory, or paste a product URL."
        )
    else:
        await update.message.reply_text(
            "Welcome to VirtualFit! I'll show you what any outfit looks like on you.\n\n"
            "First, send me a clear selfie, standing and facing the camera in good lighting."
        )


async def cmd_myselfie(update: Update, context: ContextTypes.DEFAULT_TYPE) -> None:
    user_id = update.effective_user.id
    if not has_selfie(user_id):
        await update.message.reply_text("You haven't saved a selfie yet. Send me a photo to get started.")
        return
    await update.message.reply_photo(
        photo=get_selfie_path(user_id).read_bytes(),
        caption="This is your saved reference photo."
    )


async def cmd_updateselfie(update: Update, context: ContextTypes.DEFAULT_TYPE) -> None:
    user_id = update.effective_user.id
    PENDING_SELFIE_UPDATE.add(user_id)
    await update.message.reply_text("Send me your new selfie.")


async def cmd_help(update: Update, context: ContextTypes.DEFAULT_TYPE) -> None:
    await update.message.reply_text(
        "Commands:\n"
        "/start - restart or reset\n"
        "/myselfie - view your saved reference photo\n"
        "/updateselfie - replace your reference photo\n"
        "/help - show this message\n\n"
        "Tips for best results:\n"
        "- Stand facing the camera in even lighting\n"
        "- Full body or waist-up works best\n"
        "- Plain background preferred\n"
        "- One person in the photo only"
    )
Handling Photo Messages
When a user sends a photo, the bot needs to decide whether it is a selfie (to be saved as their reference) or a garment image (to trigger a try-on). Add the photo handler:
async def handle_photo(update: Update, context: ContextTypes.DEFAULT_TYPE) -> None:
    user_id = update.effective_user.id
    photo = update.message.photo[-1]
    file = await photo.get_file()
    photo_bytes = await file.download_as_bytearray()

    if not has_selfie(user_id) or user_id in PENDING_SELFIE_UPDATE:
        save_selfie(user_id, bytes(photo_bytes))
        PENDING_SELFIE_UPDATE.discard(user_id)
        await update.message.reply_text(
            "Got it! Your reference photo is saved.\n"
            "Now send me a photo of a clothing item or accessory, or paste a product URL."
        )
        return

    # Garment photo: run try-on
    await update.message.reply_text("Generating your try-on photo... (usually 10-20 seconds)")

    garment_b64 = base64.b64encode(bytes(photo_bytes)).decode()
    selfie_b64 = get_selfie_b64(user_id)

    context.user_data["last_garment_b64"] = garment_b64

    try:
        result_bytes, elapsed, cost = await asyncio.get_event_loop().run_in_executor(
            None, lambda: run_tryon(selfie_b64, garment_b64)
        )
        await update.message.reply_photo(
            photo=result_bytes,
            caption="Happy with this? Try a different item anytime.",
            reply_markup=tryon_keyboard(),
        )
        await update.message.reply_text(f"Time: {elapsed:.1f}s   Cost: ${cost:.4f}")
    except Exception as e:
        await update.message.reply_text(f"Something went wrong: {e}")
Telegram delivers every photo as an array of versions at different resolutions. update.message.photo[-1] picks the last one, which is always the highest resolution available.
run_tryon is a synchronous function that blocks while it polls the BFL API. Calling it directly inside an async handler would freeze the bot for every other user until it returns. Wrapping it in run_in_executor hands it off to a thread pool, so the async event loop stays free to handle other messages while generation is in progress.
context.user_data["last_garment_b64"] stores the garment image after each try-on so the regenerate button has something to work with. context.user_data is per-user persistent storage provided by python-telegram-bot, so each user's last garment is kept separately.
Handling URL Messages
When a user sends a text message starting with http, the bot scrapes the product image and runs the try-on:
async def handle_text(update: Update, context: ContextTypes.DEFAULT_TYPE) -> None:
    user_id = update.effective_user.id
    text = update.message.text.strip()

    if not text.startswith("http"):
        if not has_selfie(user_id):
            await update.message.reply_text(
                "Send me a selfie first so I have a reference photo of you."
            )
        else:
            await update.message.reply_text(
                "Send me a photo of a clothing item or paste a product URL to try it on."
            )
        return

    if not has_selfie(user_id):
        await update.message.reply_text(
            "Send me a selfie first so I have a reference photo of you."
        )
        return

    await update.message.reply_text("Fetching product image and generating your try-on... (usually 10-20 seconds)")

    garment_bytes = await asyncio.get_event_loop().run_in_executor(None, lambda: scrape_og_image(text))
    if not garment_bytes:
        await update.message.reply_text(
            "Couldn't fetch an image from that URL. Try uploading a photo of the item directly."
        )
        return

    garment_b64 = base64.b64encode(garment_bytes).decode()
    selfie_b64 = get_selfie_b64(user_id)
    context.user_data["last_garment_b64"] = garment_b64

    try:
        result_bytes, elapsed, cost = await asyncio.get_event_loop().run_in_executor(
            None, lambda: run_tryon(selfie_b64, garment_b64)
        )
        await update.message.reply_photo(
            photo=result_bytes,
            caption="Happy with this? Try a different item anytime.",
            reply_markup=tryon_keyboard(),
        )
        await update.message.reply_text(f"Time: {elapsed:.1f}s   Cost: ${cost:.4f}")
    except Exception as e:
        await update.message.reply_text(f"Something went wrong: {e}")
Handling Inline Button Callbacks
When a user presses "Regenerate" or "Update my selfie" from the inline keyboard, the callback handler fires:
async def handle_callback(update: Update, context: ContextTypes.DEFAULT_TYPE) -> None:
    query = update.callback_query
    await query.answer()
    user_id = query.from_user.id

    if query.data == "update_selfie":
        PENDING_SELFIE_UPDATE.add(user_id)
        await query.message.reply_text("Send me your new selfie.")
        return

    if query.data == "regenerate":
        garment_b64 = context.user_data.get("last_garment_b64")
        if not garment_b64 or not has_selfie(user_id):
            await query.message.reply_text("Nothing to regenerate. Send a garment photo first.")
            return

        await query.message.reply_text("Regenerating with a different seed...")
        selfie_b64 = get_selfie_b64(user_id)
        seed = int(time.time())

        try:
            result_bytes, elapsed, cost = await asyncio.get_event_loop().run_in_executor(
                None, lambda: run_tryon(selfie_b64, garment_b64, seed=seed)
            )
            await query.message.reply_photo(
                photo=result_bytes,
                caption="Here's a new variation. Try a different item anytime.",
                reply_markup=tryon_keyboard(),
            )
            await query.message.reply_text(f"Time: {elapsed:.1f}s   Cost: ${cost:.4f}")
        except Exception as e:
            await query.message.reply_text(f"Something went wrong: {e}")
Wiring It All Together
Finally, add the main function that registers all handlers and starts the bot:
def main() -> None:
    app = Application.builder().token(TELEGRAM_BOT_TOKEN).build()

    app.add_handler(CommandHandler("start", cmd_start))
    app.add_handler(CommandHandler("myselfie", cmd_myselfie))
    app.add_handler(CommandHandler("updateselfie", cmd_updateselfie))
    app.add_handler(CommandHandler("help", cmd_help))
    app.add_handler(MessageHandler(filters.PHOTO, handle_photo))
    app.add_handler(MessageHandler(filters.TEXT & ~filters.COMMAND, handle_text))
    app.add_handler(CallbackQueryHandler(handle_callback))

    print("Bot running...")
    app.run_polling()


if __name__ == "__main__":
    main()
Running the Bot
python bot.py
Once the script is running, open Telegram and search for your bot by the username you set with BotFather. Send /start to begin. The bot will ask for a selfie first, then accept product photos or URLs to generate try-on images.
The bot supports the following commands:
/start- start or restart a conversation/myselfie- view your currently saved reference photo/updateselfie- replace your reference photo with a new one/help- show available commands and tips for best results
After each try-on image is generated, the bot also shows two inline buttons: Regenerate to get a new variation of the same item, and Update my selfie to swap your reference photo.